Replacing the Deck Core

Friday, January 1st, 2010 - The Plan
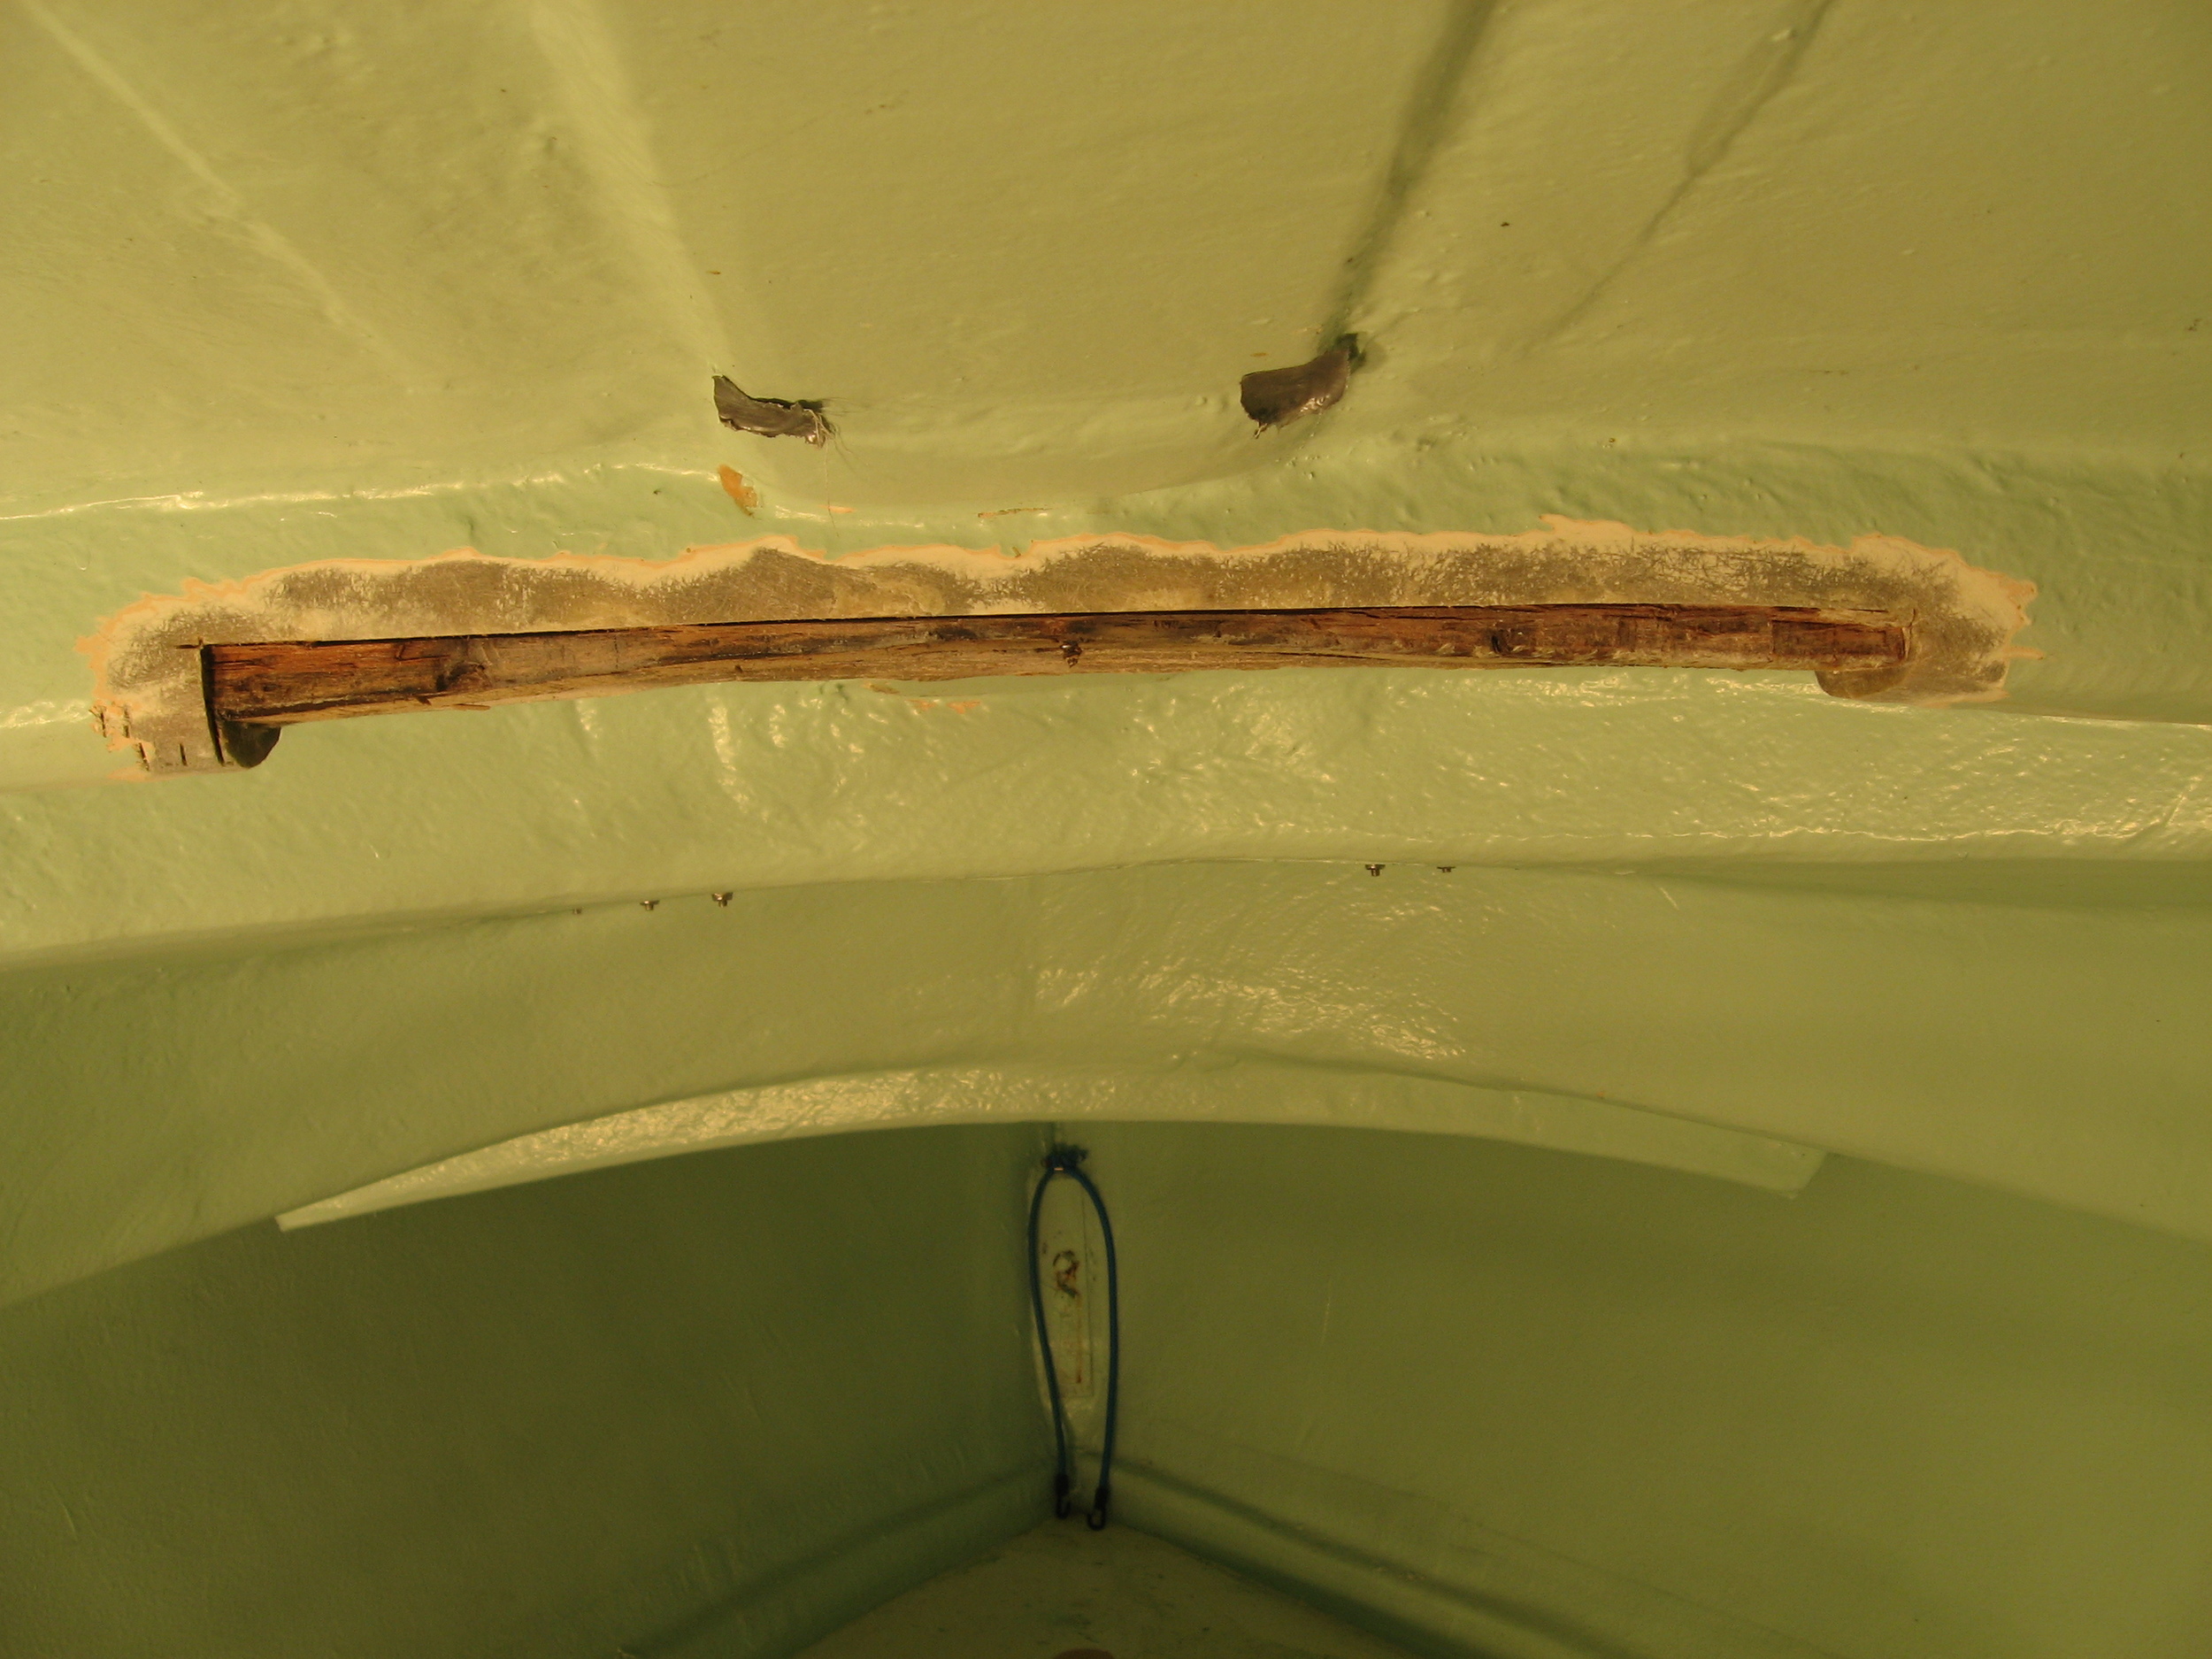
I have tried to put it off for as long as possible, but it's time to bite the bullet and replace the deck core. The deck core is essentially a piece of wood fiberglassed underneath the top of the cabin hatch running fore and aft to act as a stiffener for the mast tabernacle. Beneath that, there is a thicker cabin "arch", also made of wood, that has been fiberglassed inside running port to starboard. (In later models (1972 onward), this arch was replaced by another stiffener cross piece and a mast support pole was added.) The replacement of this arch will be covered on another page - this page will be dealing with that top piece. These two pictures here are inside the cabin looking forward. The first picture shows the stiffener core with the arch in the background. The next picture shows the core continuing on the other side of the arch ending at the rounded cabin front.


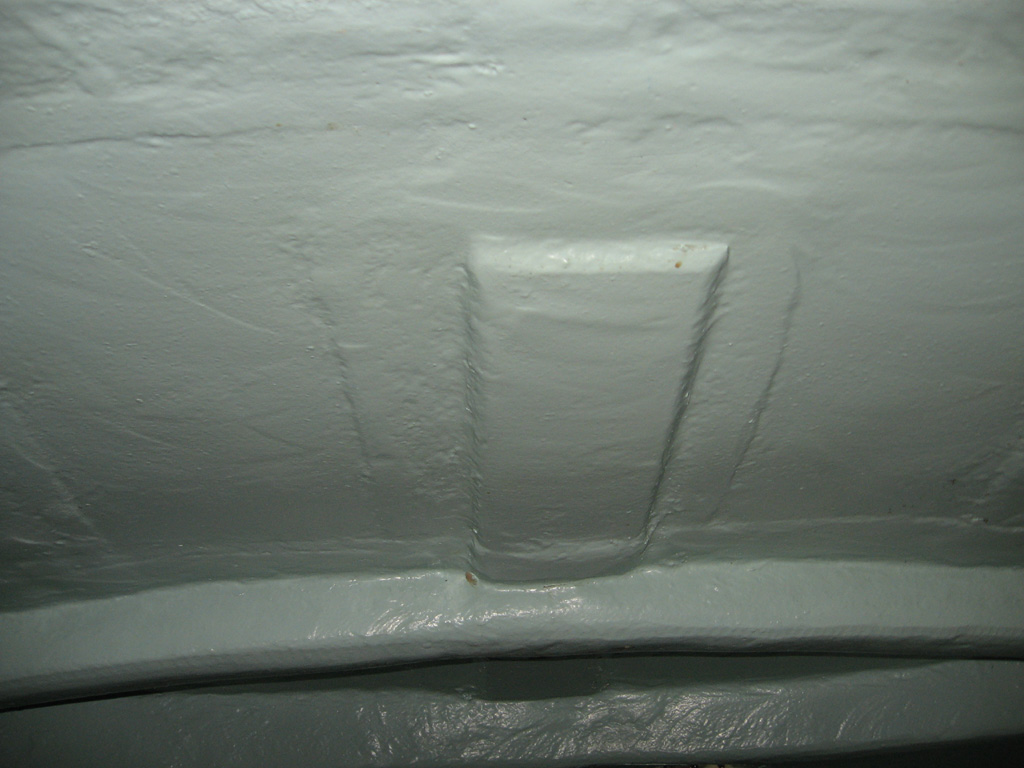
My decision to replace the core was based upon the fact that the mast tabernacle has been sinking down, evidence that the wood underneath is rotten. In fact, the tabernacle has sunk down at a slight angle, cracking the fiberglass on the starboard side, allowing even more water to enter over time. In the first picture here, you can see the tabernacle with a halyard organizer plate underneath it (the blocks are still attached). Everything looks fine, right? But when I removed it, the large, horrifying crack was exposed, as well as other damage right underneath the plate. You can see the four screw holes where the new tabernacle was attached as well as three gaping black holes where the previous, original tabernacle was attached.
Inside the cabin, I measured the core to be about 4" X 28". The goal is to cut off the top skin of fiberglass, dig out the rotten wood core, replace it with carbon fiber G-10, and reattach the top skin. I hope to reuse that existing piece, but if I can't do it, I'll simply put new fiberglass cloth on the top. While I was inside the cabin, I drilled a small hole in each corner of the core, going all the way up through the top skin so I could see exactly where it was from on top. This picture shows, in red, the outline of where the core is. The next step is to take a small, cordless circular saw and cut off the top skin. Stay tuned.
Friday, January 8th - Removing the Skin
I finally had the opportunity to remove the top skin last night, and it went perfectly. The first thing I did was drill a hole with a hole saw in each end, then I took the cordless circular saw and cut down both lengths. The skin came off quite easily - there was no bond left between it and the core. The whole plywood piece was soaking wet - it was definitely time to replace it, and I'm glad I started this project. It started crumbling and splitting apart as soon as I started probing with a screwdriver. I began to chisel the plywood out, but it got to be a little too late. I'll continue on Sunday.


Sunday, January 10th - Removing the Core
Despite the cold temperatures today, I was able to remove the rest of the wooden deck core. I actually had to cut more out of the fiberglass deck to get to it all, and I used a router with a very small-diameter straight tip bit to do it. After that, it was just more chiseling and scraping away. But now, it's all clean and totally free of rotten wood, except for a chunk that's actually the top of the wooden cabin support arch, bisecting the slot. It's apparent that before I can put in a new core, I need to get rid of the rotten wood in the arch. So, it looks like that's going to be the next step, and the deck core is just going to have to wait until I can do that.
Friday, January 15th - Surprise!
I had quite a surprise last night. The original plan was to remove just the bottom skin of the cabin arch, keeping it intact; then I would scoop all the rotten wood out, replace it with something, and then re-attach the bottom skin. Well, I had just started to cut all around the bottom edge when I stopped for a moment, and thought, why not just see how the wood is underneath before I go crazy taking the whole skin off (as it was proving to be no easy task)? So, I cut off a flap right underneath the tabernacle, which is where I was most concerned. (There was a screw that came out with it, as you can see in the picture). And, surprise - it wasn't hardly as rotten as I thought it would be! In fact, it's all quite solid! The discoloration of the wood on the edges seems to be mostly hardened polyester resin from when it was built with only a minimal amount of rot.


Fearing the worst, I had expected to have the whole cabin arch a crumbling mess of wet, rotten wood. Instead, it's very hard and in pretty good shape. I know for a fact, however, the two bottom sides of the arch are pretty rotten as water coming in from the top drained down either side. At any rate, this discovery changes everything - I have now decided not to cut off the whole bottom skin after all. My new game plan is thus: repair the flap I just cut off, repair the cuts I made in the side of the arch, and leave a hole or two at the bottom of each side of the arch for water to continue to drain. Once I finish the top of the deck, no more water should make its way down to the arch. Therefore, water should drain out and eventually become dry, even if that takes a year or more to do. Perhaps when no more water comes out, I'll experiment with something like "Git Rot", but for now, I'm content to leave it alone. After all, the arch itself wasn't structurally compromised - I just figured I would replace the rotten wood at the same time I tackled the deck core. But since it seems to be okay for the most part, I won't bother trying to fix what ain't broken.
Sunday, January 17th - Beveling the Edges
I went back to the deck today to start preparing for the new deck core. In order to properly build up the layers of fiberglass, it's important to sand the surrounding edges creating a 12:1 bevel. This is explained in both the WEST System's fiberglass repair manual as well as Bruce Niederer's article on replacing damaged deck core. Since the deck is approximately 1/4" thick, a 12:1 bevel meant that I had to begin the bevel 3" out from the cut. So, after marking it with a pencil (I cheated a little at the forward part where the cabin top starts to curve), I took an electric disk sander and went to town. The next step is to get the new G-10 deck core which I have measured to be approximately 4 1/4" wide by 27 1/2" long by 3/8" thick. I also have to start beveling the areas all around the cabin arch cut-out as well as the cuts I made in the side of the arch so I can repair those with fiberglass tape.


Friday, January 22nd - Installing the New Core
I obtained the new G-10 deck core from Forte Carbon - you can see where they actually had to splice a small piece on at the end to make it 27 1/2" long, but it's still plenty strong. I then proceeded to follow the directions in WEST's repair manual. I sanded both the G-10 and the slot with 80-grit sandpaper, vacuumed it out, and wet-out the slot with a mix of WEST System 105 Resin and 205 Hardener. An interesting note - in warm temperatures, it's important to use 206 Slow Hardener, but in cold temperatures, the fast-acting 205 hardener will actually work better. This is because it has been "designed with a chemically-activated polyamine system which exhibits a good cure as low as 35º F (1.5º C). It exhibits a faster cure characteristic than 206 Slow Hardener and offers less uncured exposure time which reduces the chances of incomplete cure due to cold temperatures" (taken from the repair manual).
I then mixed a substantial batch of 105/205, adding 404 filler to make a mayonnaise-like consistency. I used a notched spreader to coat the bottom and all sides, making sure to get it in every crevice. After that, I simply placed the core in the slot and pressed it down firmly until a little epoxy mix squeezed out of the sides. Since the forward edge of the G-10 sat ever-so-slightly beneath the fiberglass edge, I mixed a little more epoxy and applied it to that edge just to fair it a little. This should make it a little smoother when putting on the new fiberglass, which is the next step after everything cures.


Sunday, January 24th - Fiberglassing the Top
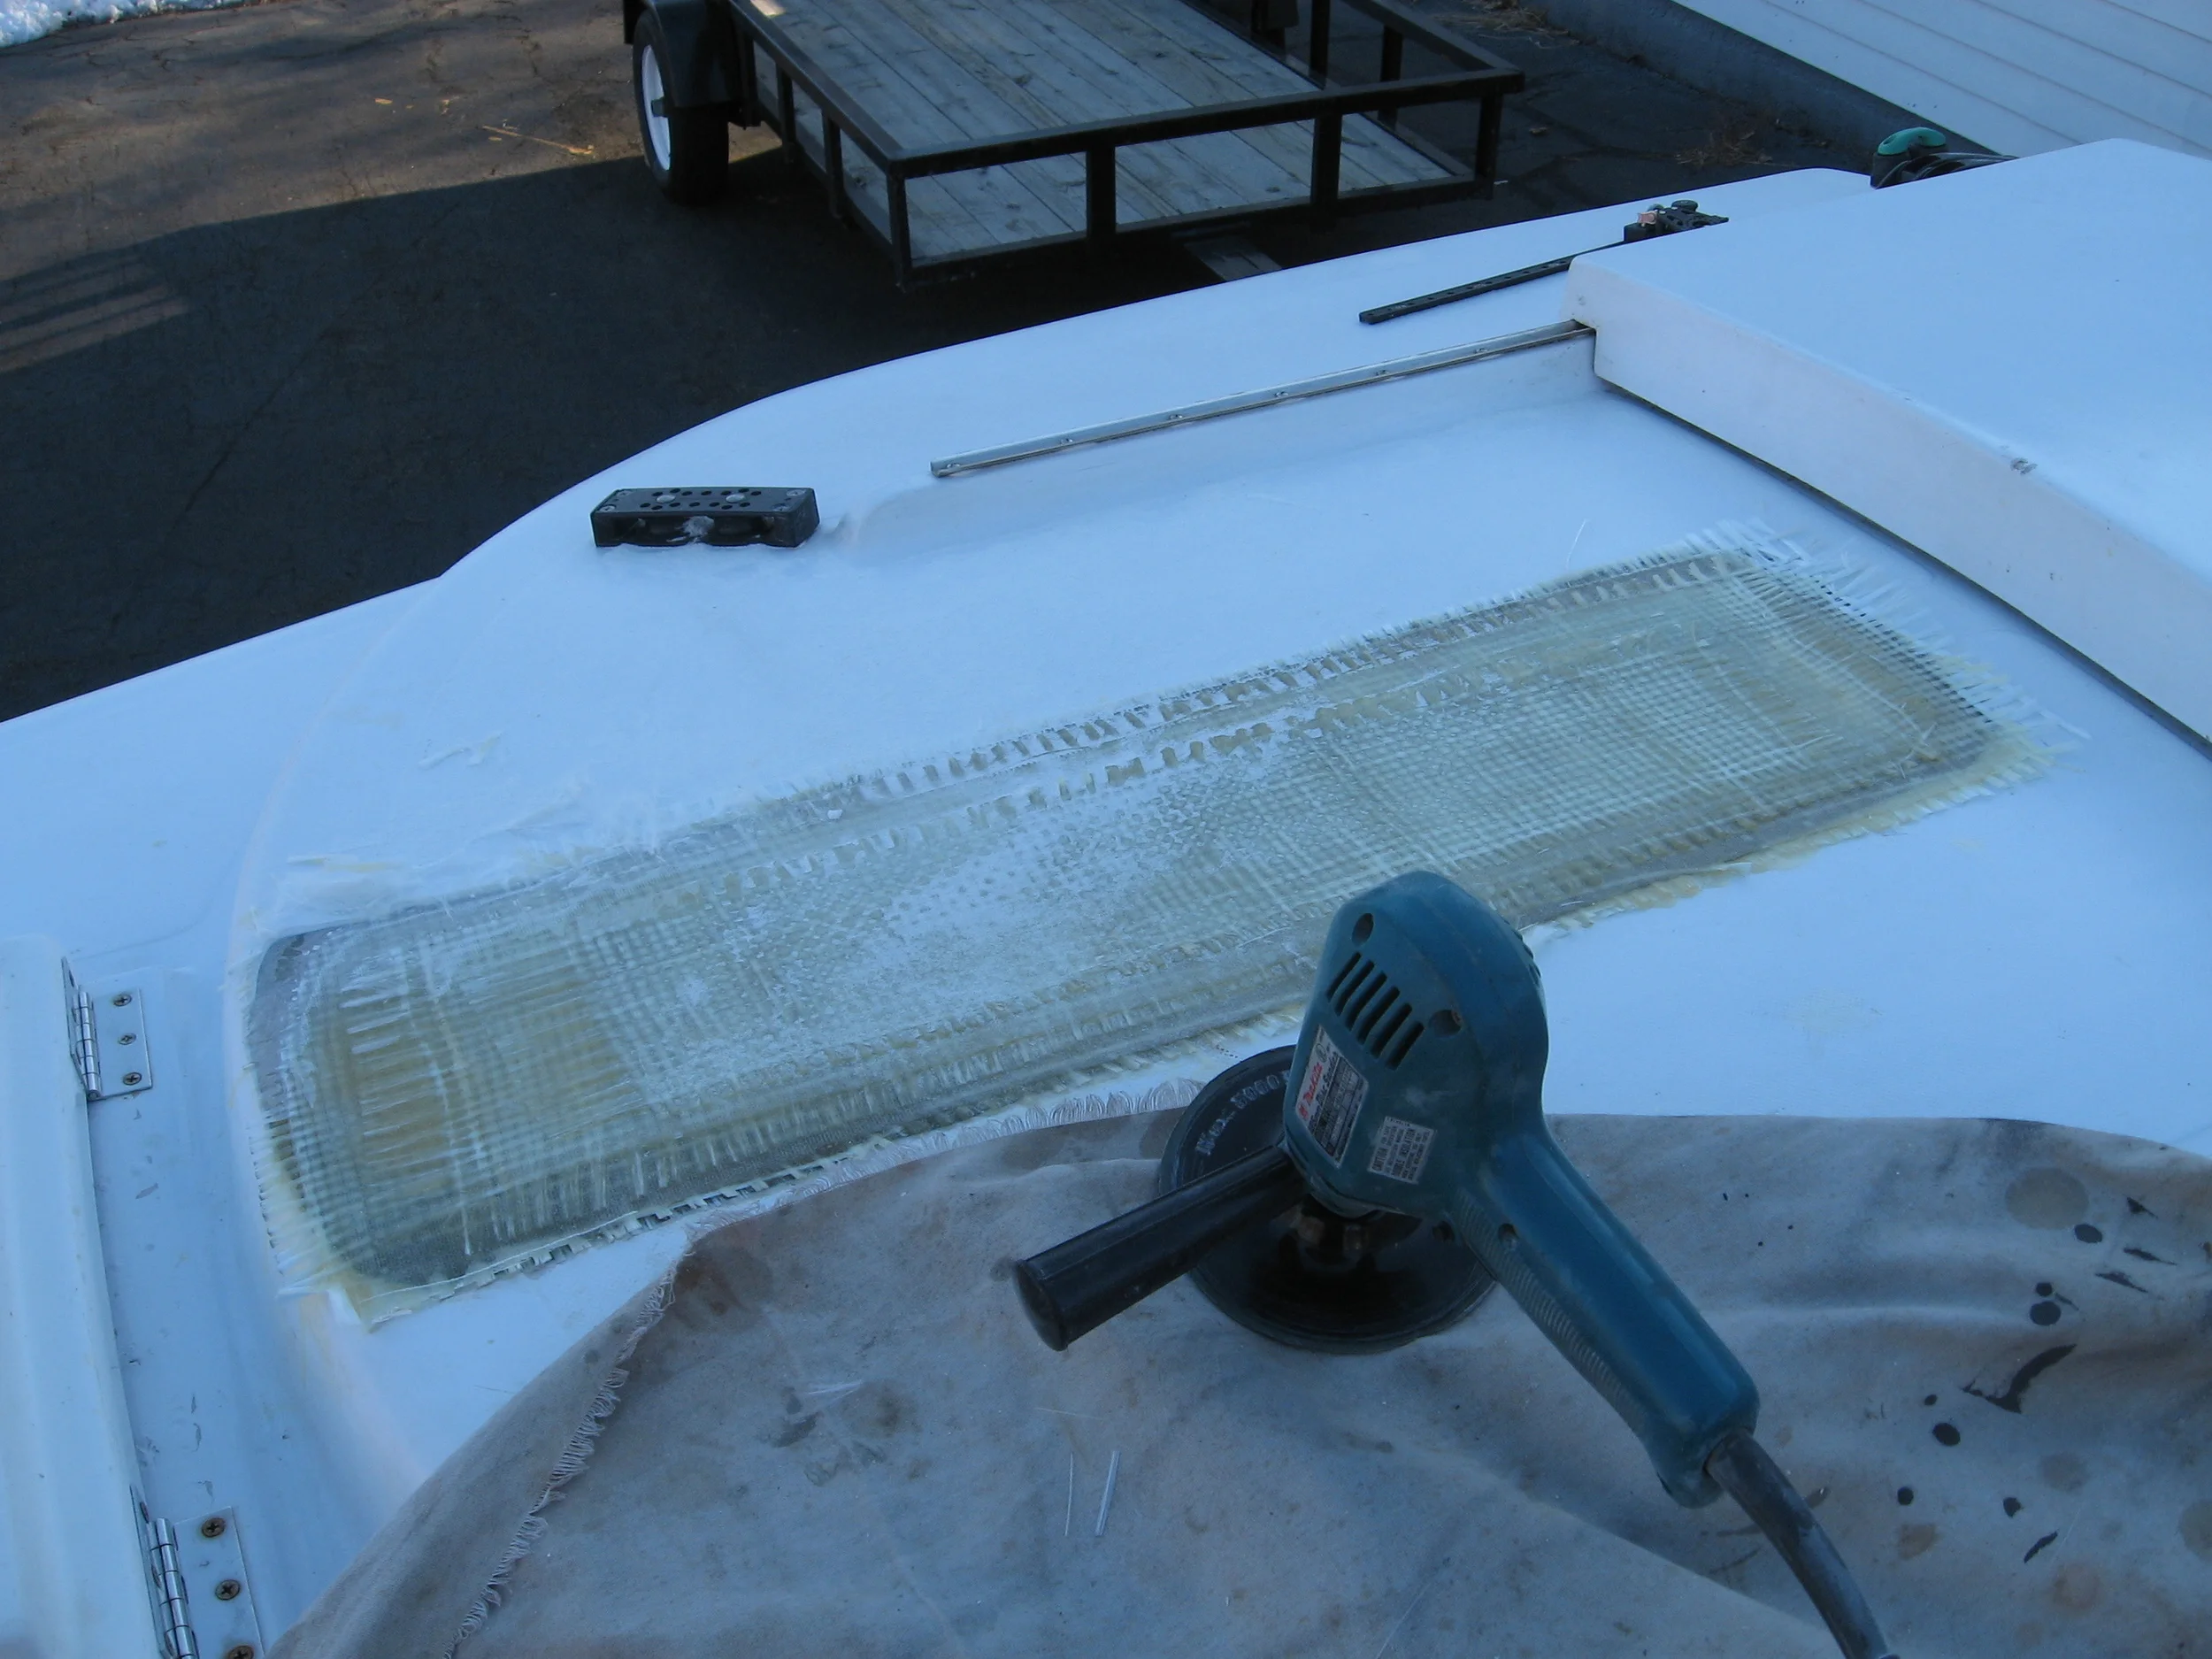
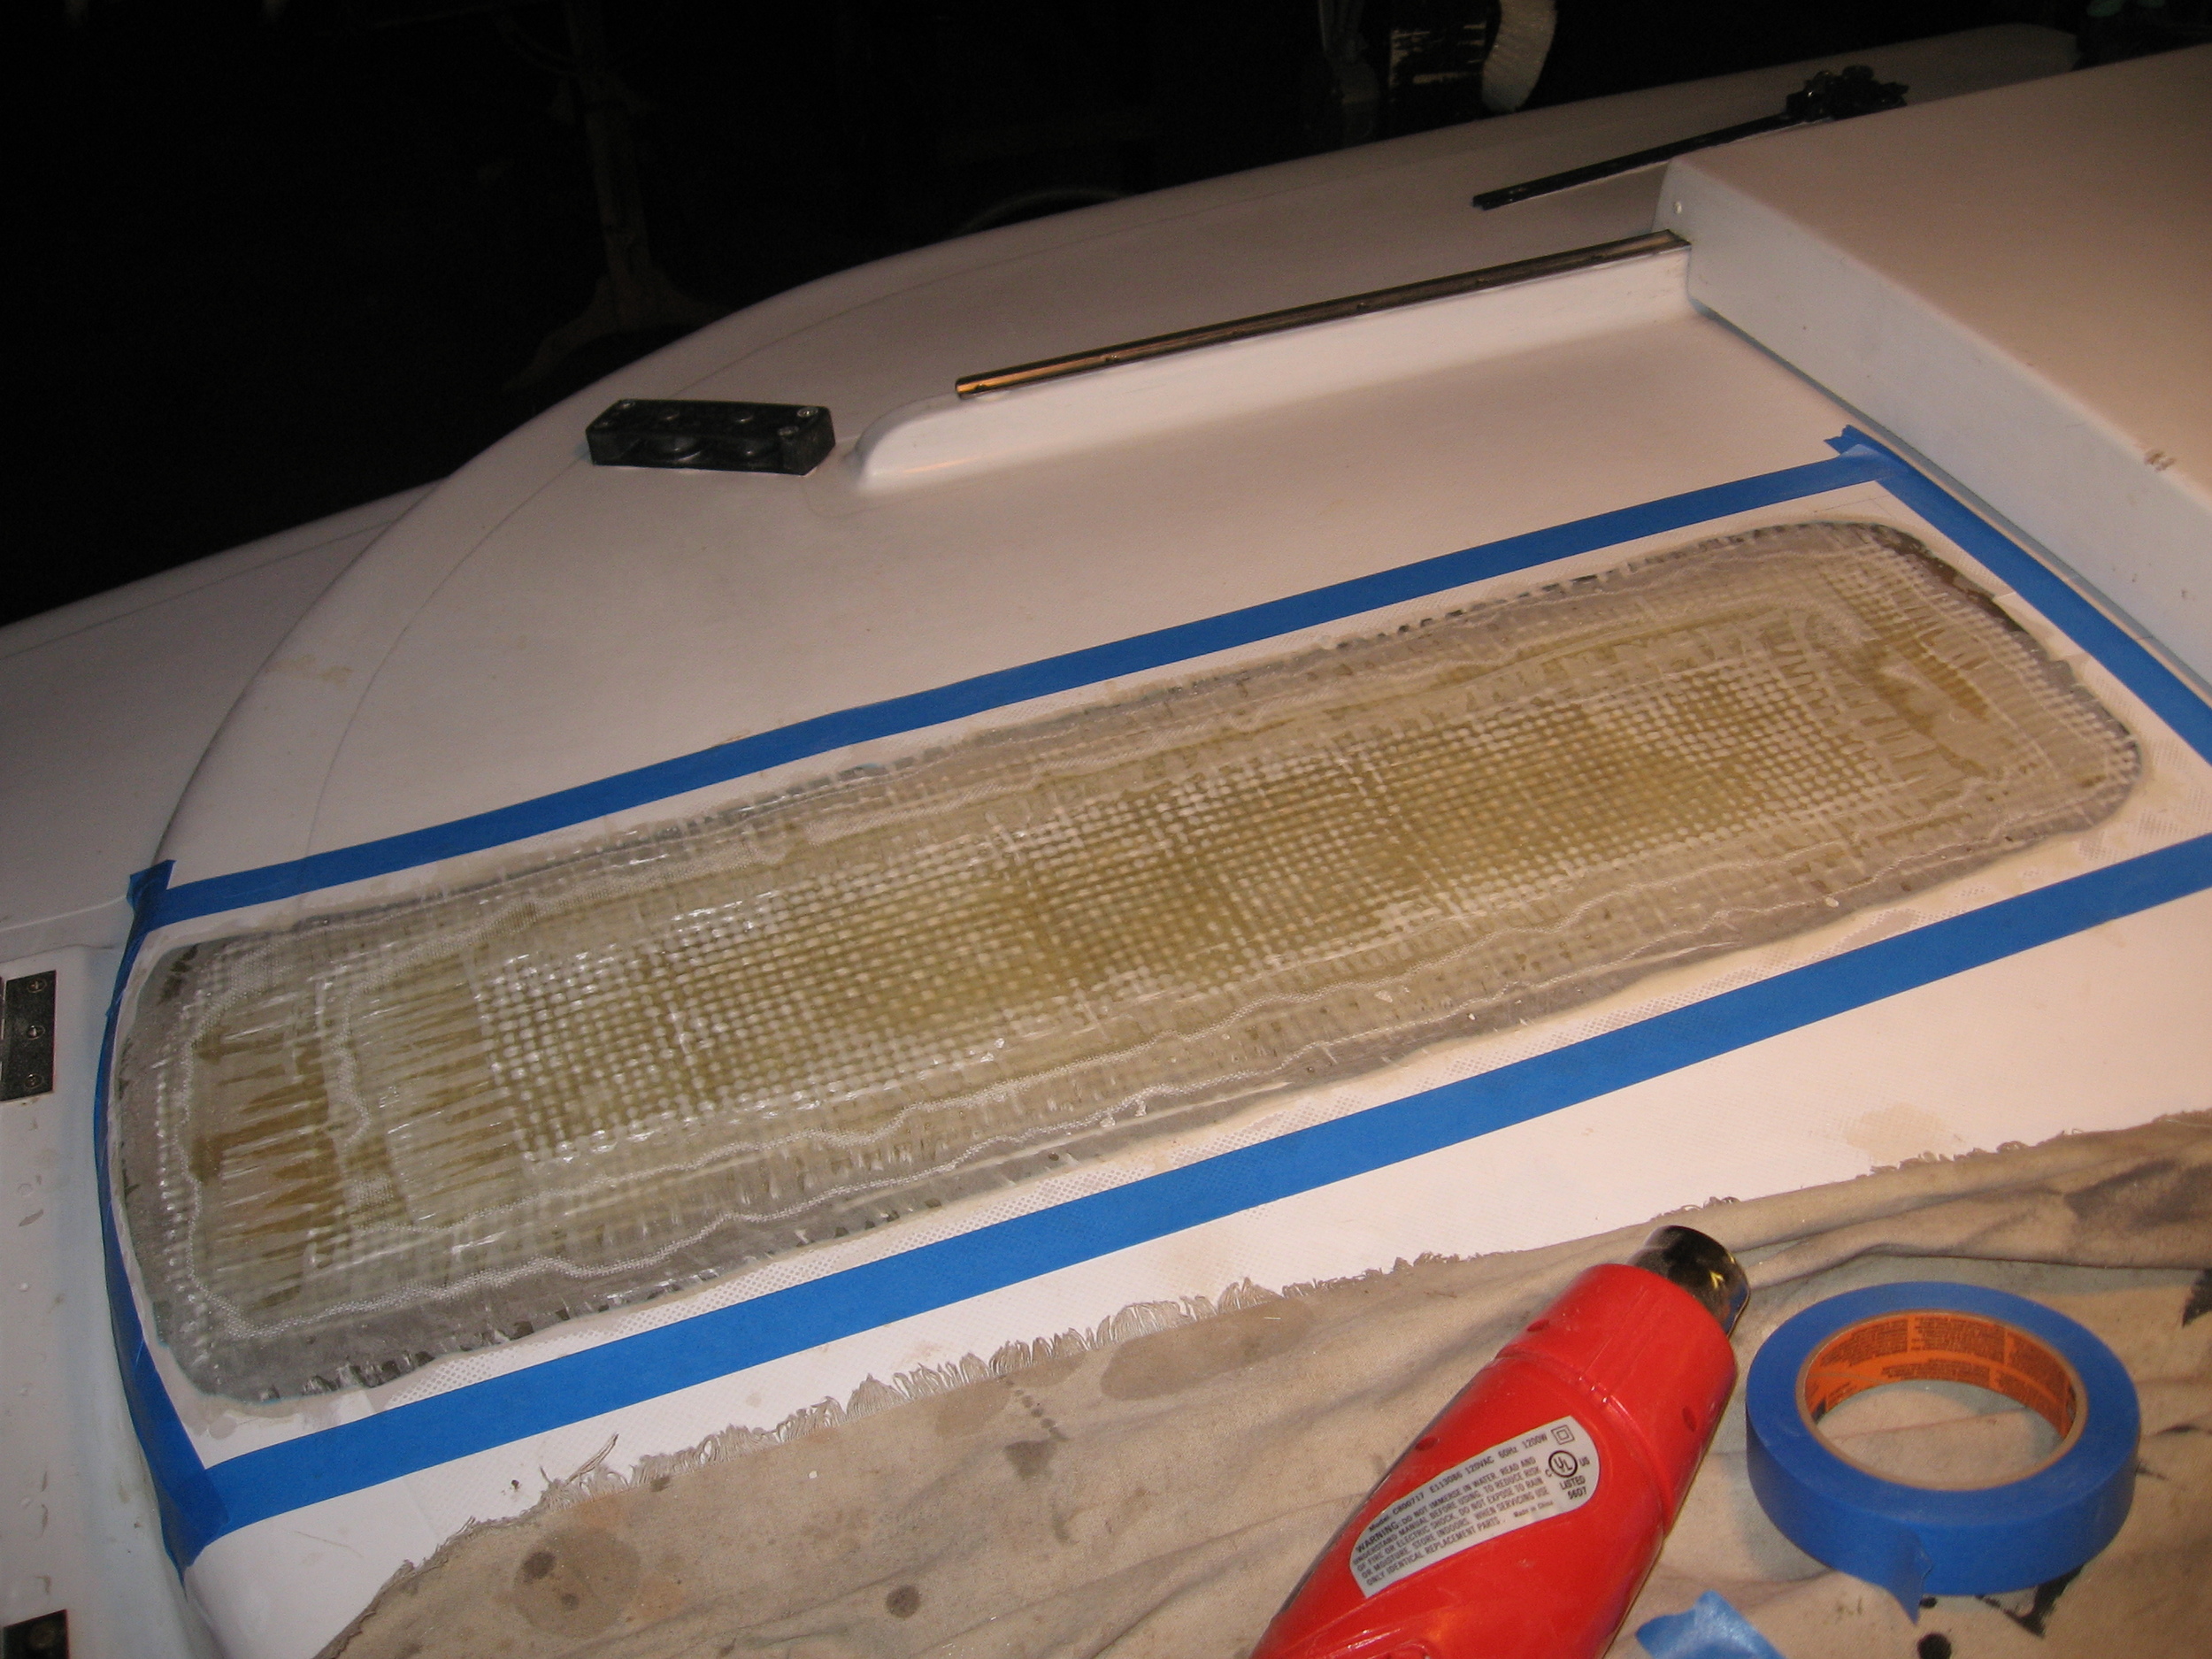
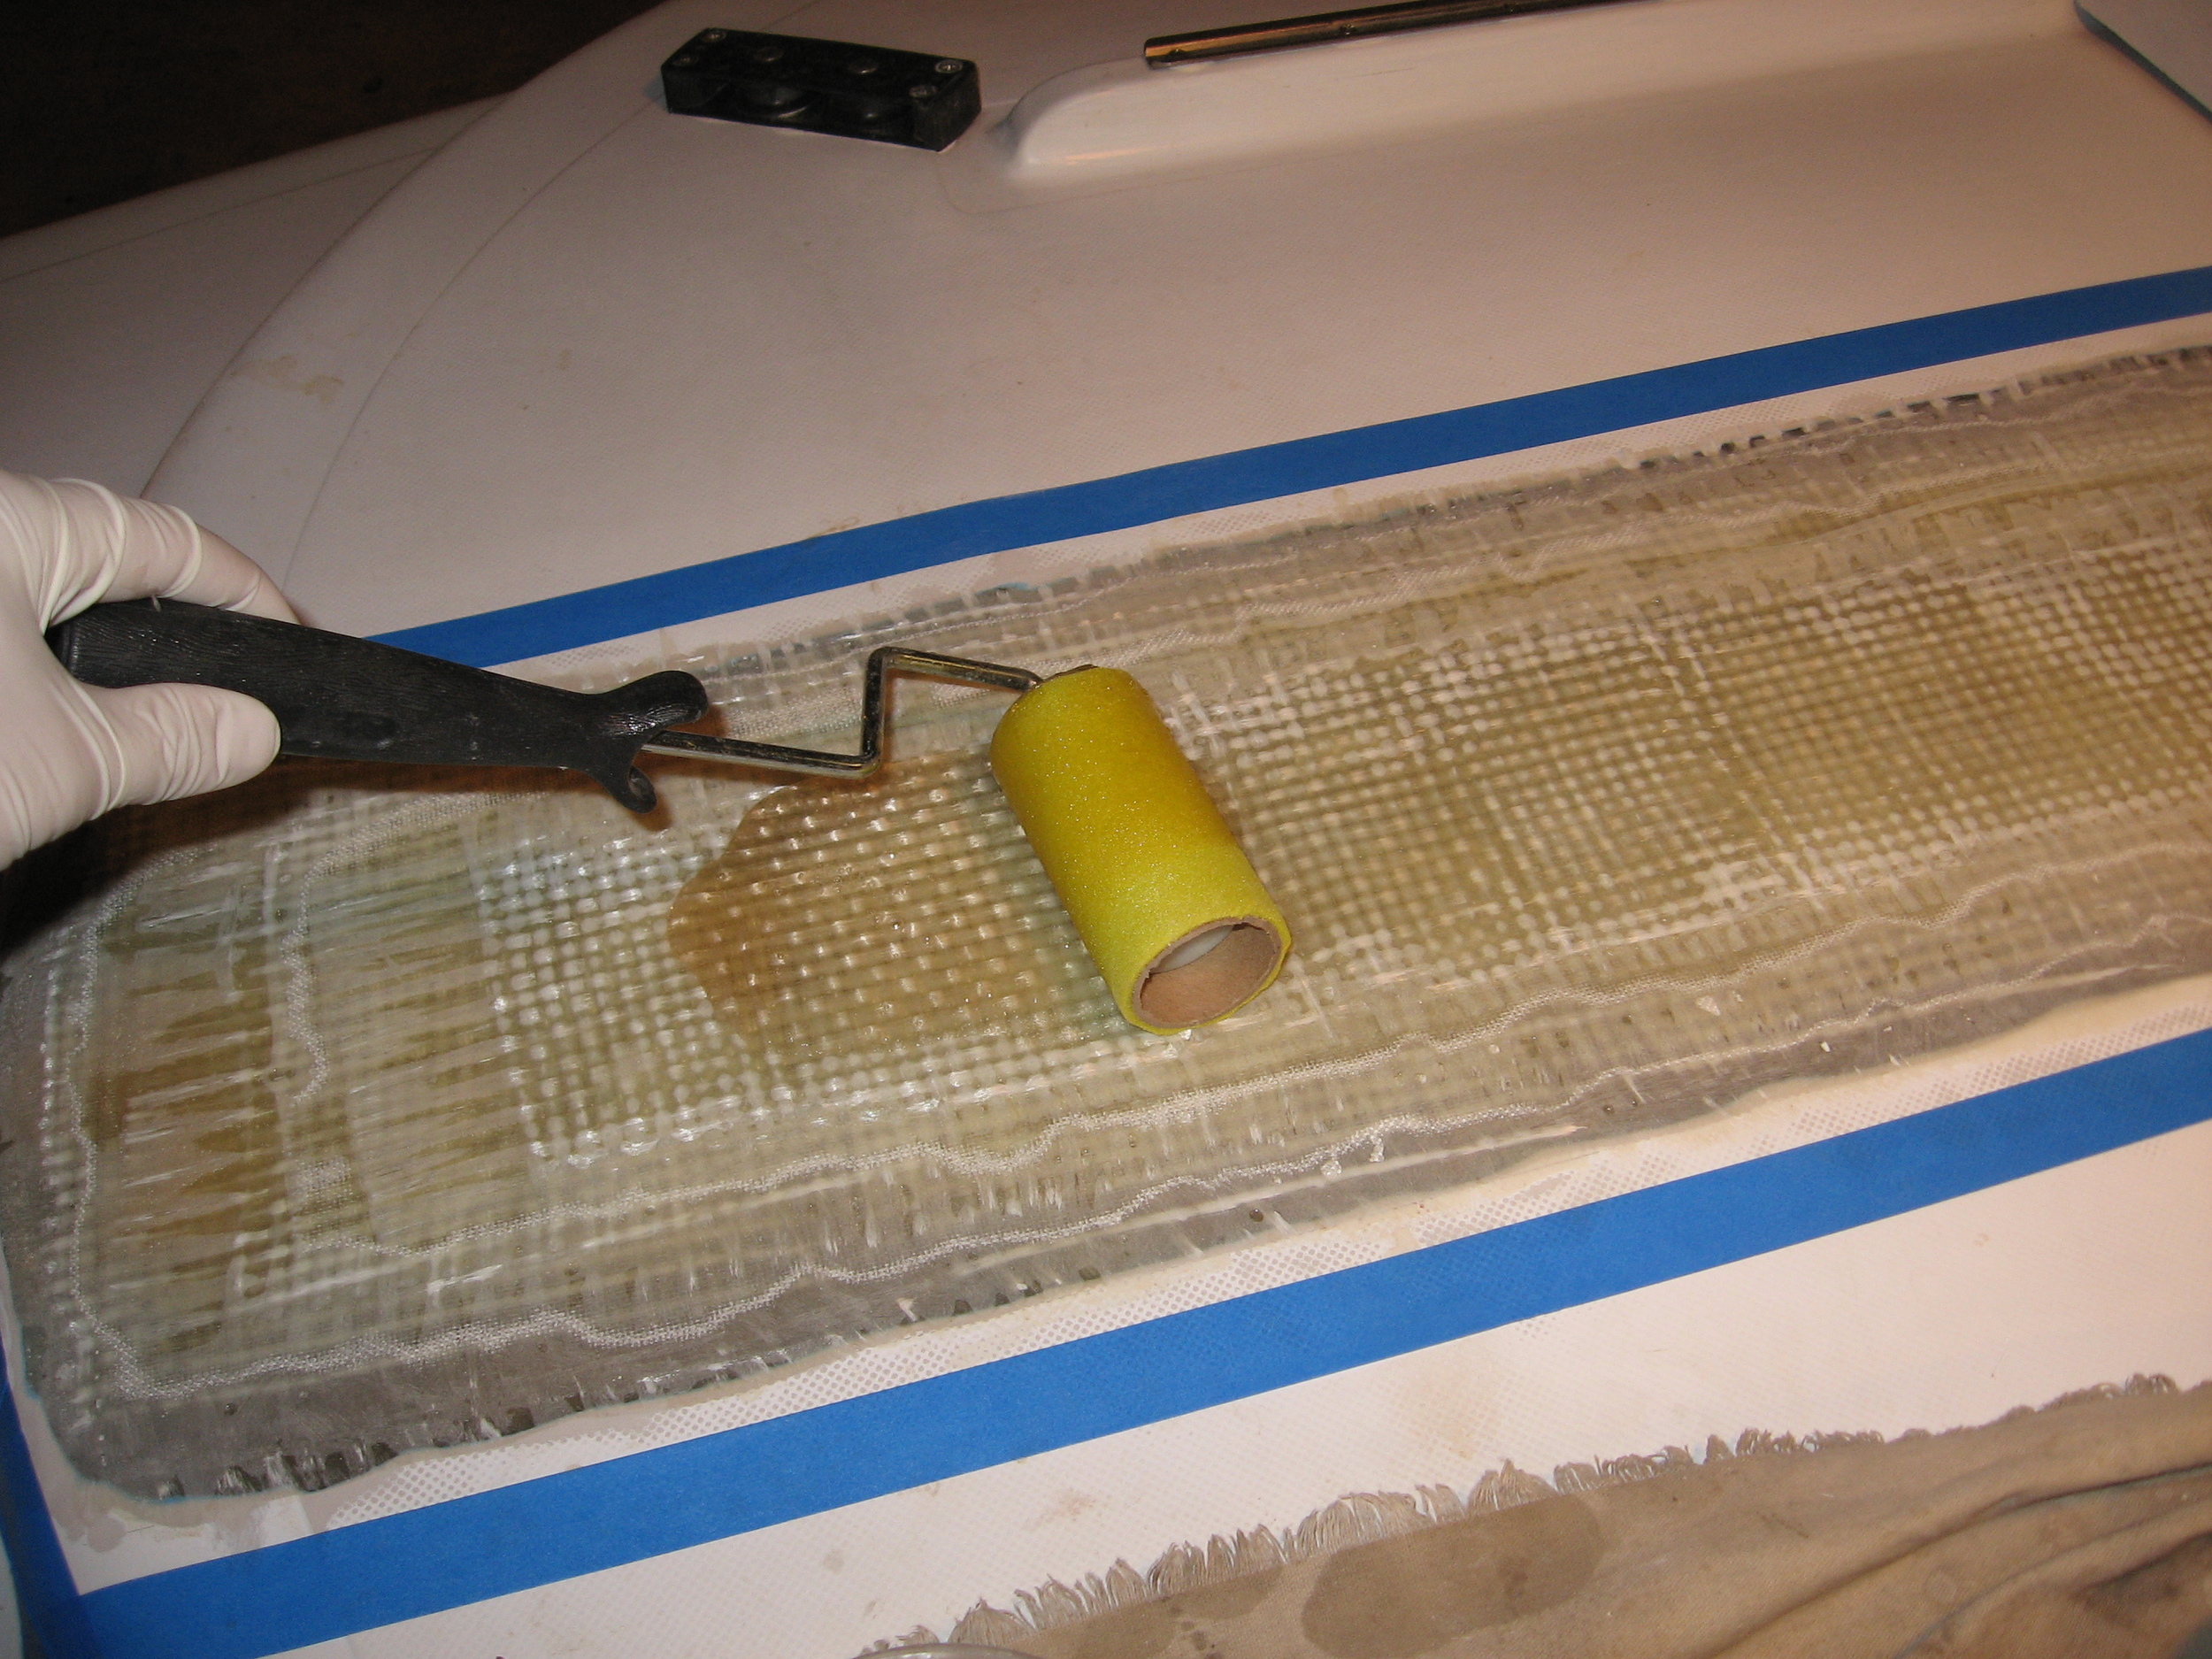
The thickness of the deck actually varied somewhat, although it was generally about 1/4" thick (0.25"). In order to build up close to this thickness, I used three layers of layers of 24-oz mat roving and two layers of 12-oz cloth, alternating them as I went along. Each layer was slightly smaller than the previous one in order to match the sanded bevel and thus spread the load. 24-oz roving is about 0.04" thick (wet-out), and 12-oz cloth is about 0.02". The sum is about 0.16" which gives me a little room to play when fairing the deck with more epoxy and fairing filler. If it turns out it's not as thick as I'd like, I'll just add more fiberglass. The next step is to cut off excess fiberglass around the edges with a sharp knife, then sand everything well to prepare for fairing.
Sunday, February 7th - Sanding the Top
I had a small window of opportunity today to bring Orion outside and sand the top - I didn't want to get fiberglass dust all over the garage bay. So, after donning multiple layers of clothing and a respirator, I pulled her out onto the driveway and got to work. The first step was to grind down the really high spots with the disc sander (around 36 grit) and then finish with a random orbital sander (80 grit). It worked out very well - I didn't even need a sharp knife to cut the edges, I just ground them off. The next step is to fair the area with epoxy and fairing compound. I almost did that today, but I needed a couple tools I had left at home, so I packed it in early. I'll try and get to that on Friday.


Friday, February 12th - Fairing the Top
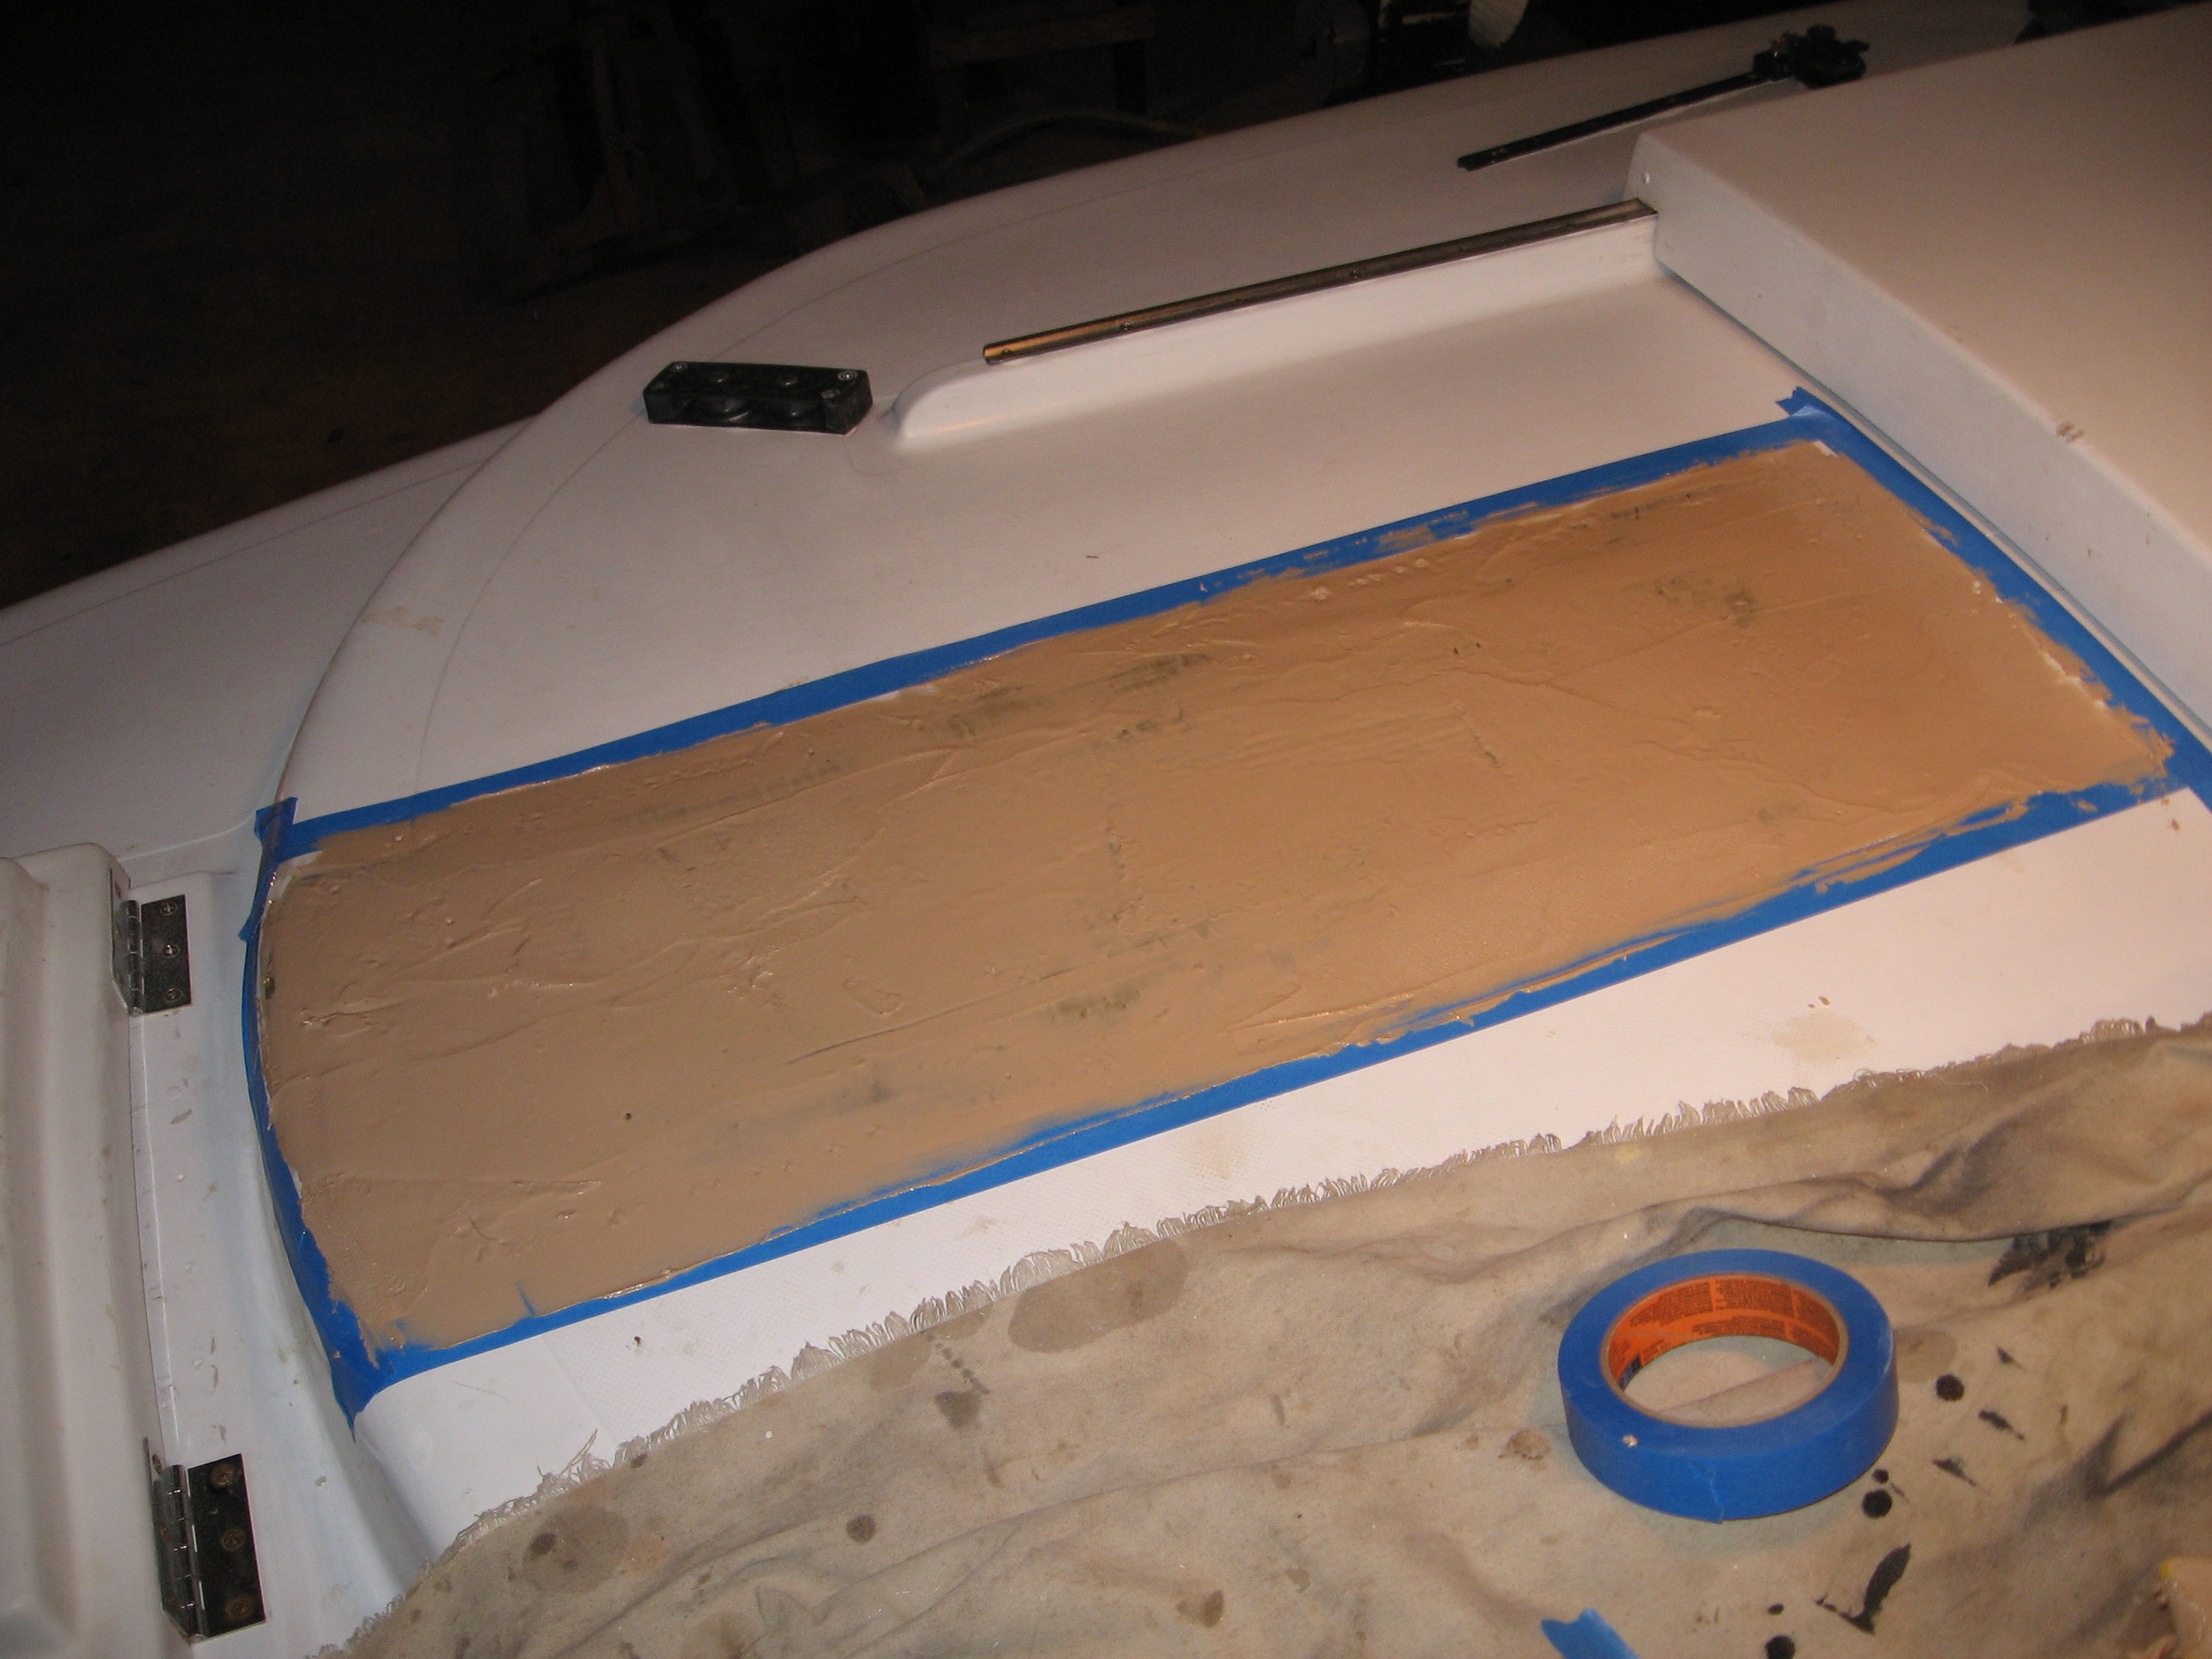
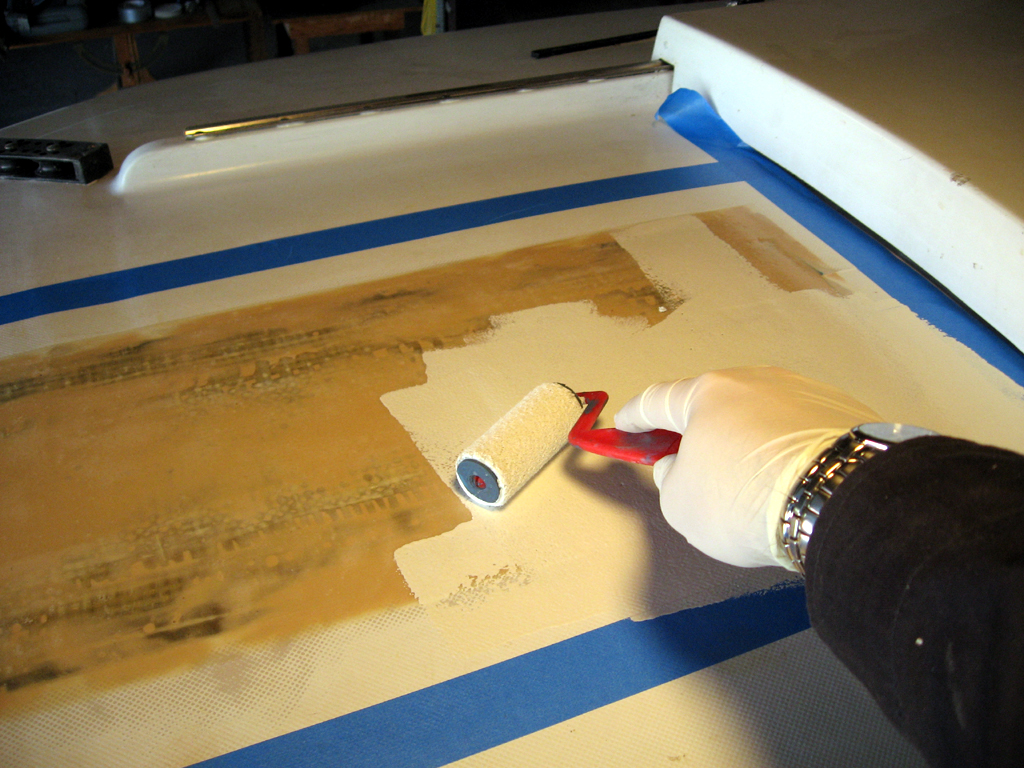
When fairing the top, I wanted to be sure to that the final faired surfaces had straight lines to make it look like this "patch" was supposed to be there. So, before I began, I taped off a rectangle, much like one would when painting. I then wet-out the area with WEST 105/205 using a roller. I then mixed a batch of 105/205 adding 410 fairing compound - I ended up mixing way too much, and a lot of it was wasted, unfortunately. But once I had made a peanut-butter consistency, I then spread it on with a plastic spreader, just like I did when fairing the centerboard. I made sure to work it into all the gaps and make it as even as I could. As soon as I was done, I lifted up the tape, and voila! That part was complete. The next step is to let it cure and then sand it well to make it smooth.
Monday, February 15th - Finishing the Top
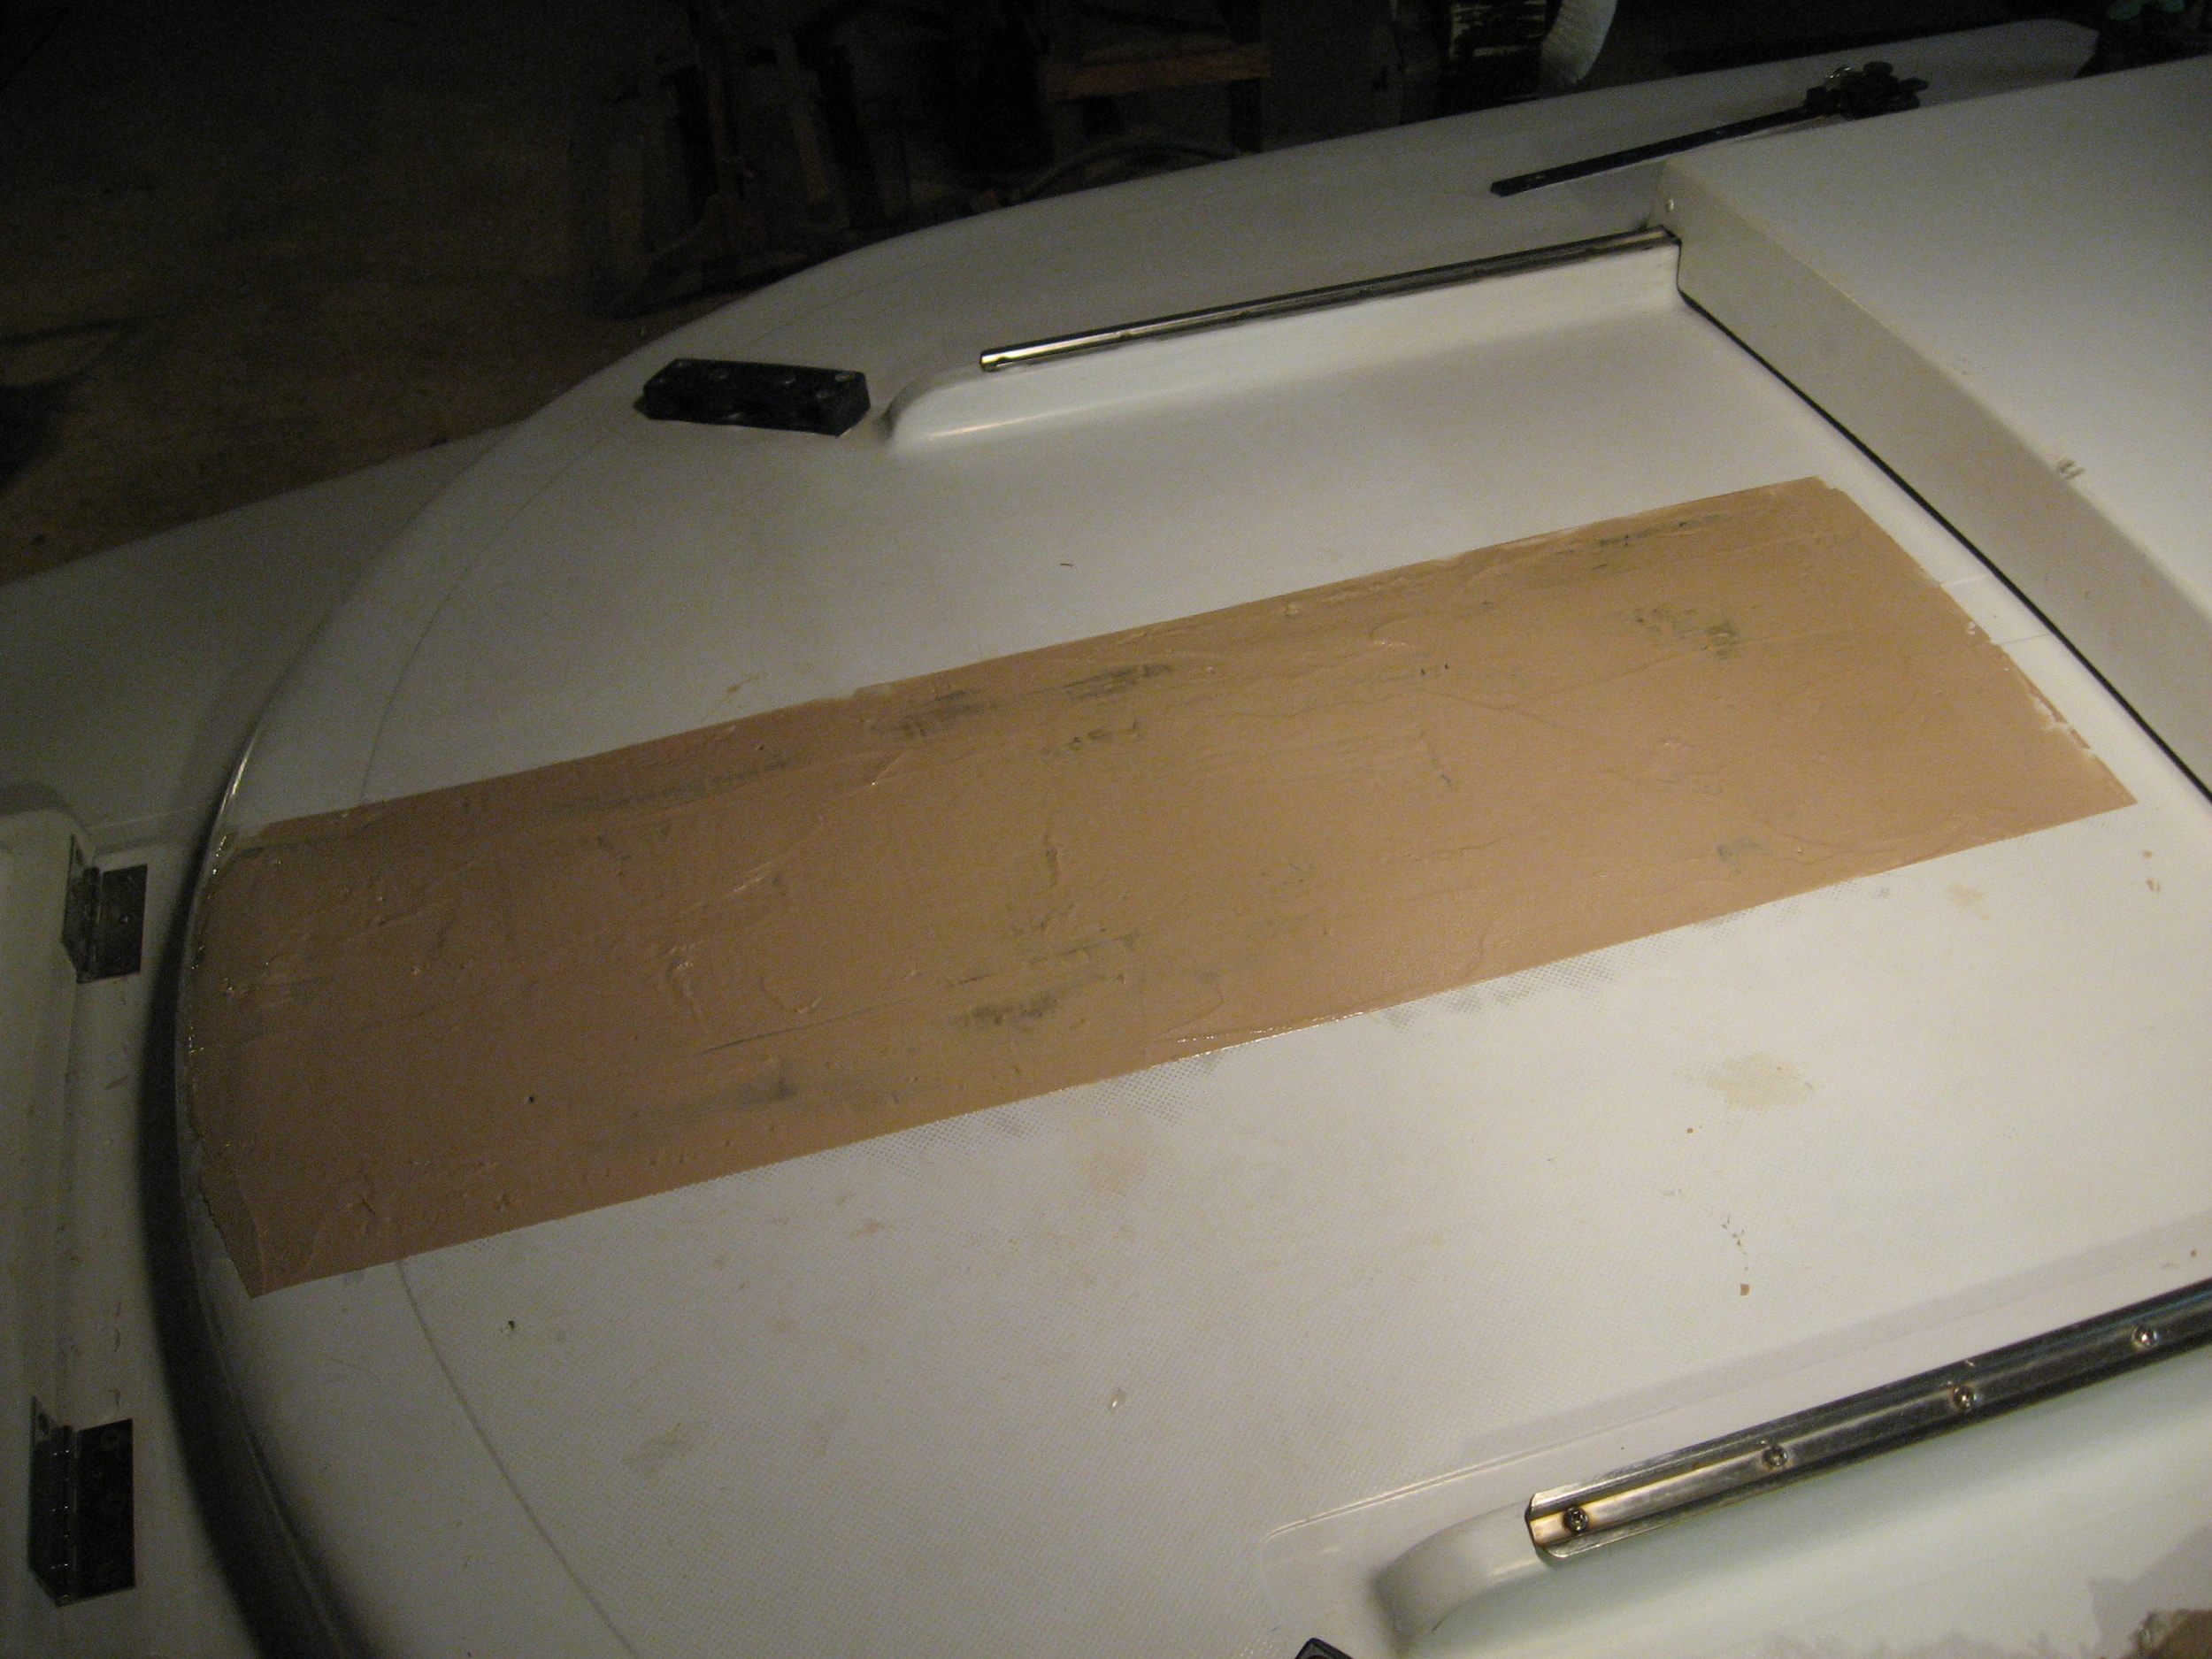
I used 80-grit sandpaper the whole time I sanded the top, and I think it came out very well. When I got to the front of the cabin, I wanted to be sure to fair it just a little more to match the slight "bump" where the smooth part of the cabin meets the non-skid. I put a strip of tape down and sanded right up to the lower edge. I then finished sanding with 100-grit paper on a block, and I'm very happy with the way it came out. I put a coating of WEST 105/205 on the top with a roller to seal it, and I'll probably put another coating on the next time. So, for now, I'm pretty much done with the top - it just needs to be painted, and I plan on painting the whole deck before Orion goes back in the water. My next project will be to handle the cabin arch repair.


Friday, February 19th - Reattaching the Flap
I got lucky when I removed that flap of fiberglass underneath the tabernacle last month, and instead of having to replace the whole cabin arch, I just needed to reattach the flap I cut out. I sanded/beveled the edges of both the arch cut-out and the flap itself for when I eventually use fiberglass tape. After that, I carefully spread WEST Epoxy Six10 on the underside of the flap and pushed it right back into place where I had taken it out before. I used an adjustable chin-up bar to keep it in place. (I had bought the bar to use as a mast support pole, but decided not to use it as the mast arch was doing a fine job supporting the mast.) I kept tightening the bar until epoxy squeezed out all the edges, and then I used a little plastic spreader to remove excess epoxy and make it look half-way decent.
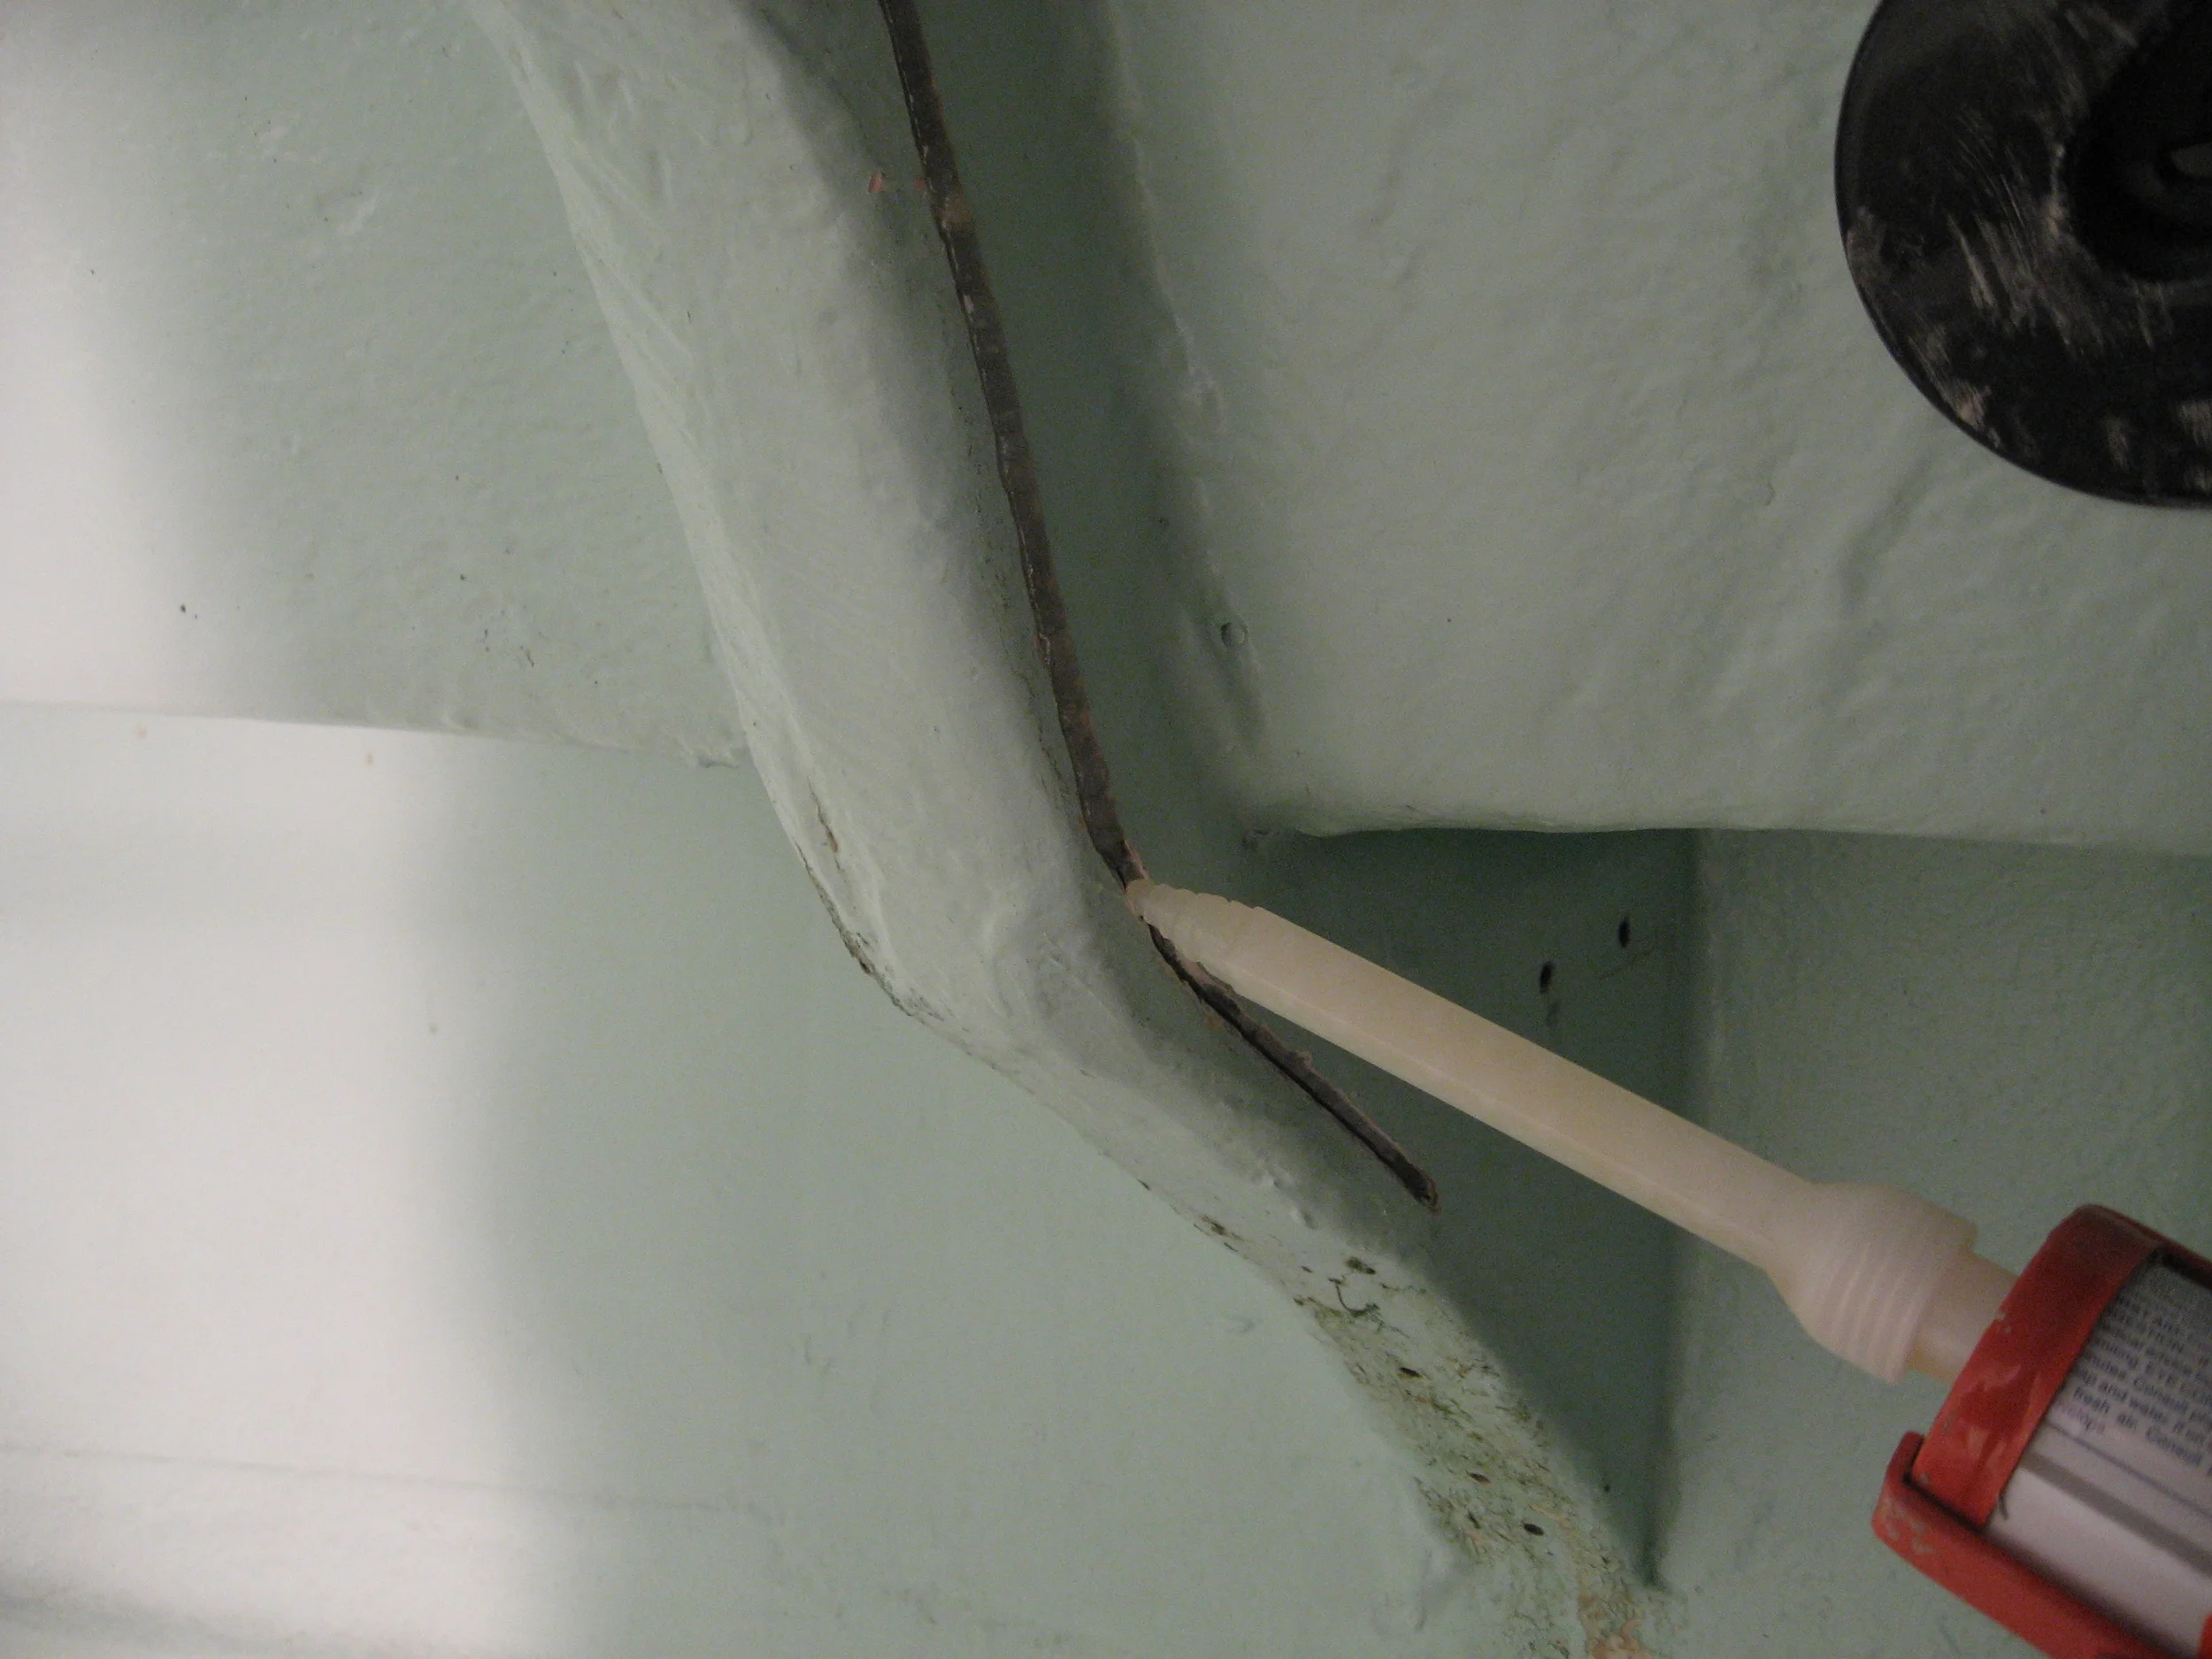
While I had the Six10 out, I decided to fill the cuts I made in the side of the cabin arch. First, I took a dremel tool and used a small grinder to open up the cut a little more and bevel the sides. This gives the epoxy that much more to grip. After that, I attached the self-mixing nozzle to the Six10 cartridge and filled the gap, smoothing it with the plastic spreader. All that only took about ten minutes. The next step is to put fiberglass tape on the arch flap.


Sunday, February 21st - Fiberglassing the Flap
Nothing too big to report today as I simply used two layers of fiberglass tape to cover the edges of the flap. While it was a straight-forward job, it was very messy working on a vertical surface. The Six10 epoxy from two days before still had just enough tackiness to it so that I could place the fiberglass on top of it and it would stay there. After applying the two layers with WEST 105/205, I put a pair of halogen lamps right underneath to keep it warm and let it cure at a higher temperature (around 55 degrees instead of 38 degrees outside the boat). The next step will be to sand it smooth and fair it a little bit to make it look nice, although I don't feel the need to be as nit-picky as I was for when I was fairing the deck core repair.
Monday, March 8th - Priming the Top
After focusing on a couple other small projects, I primed the top today - the temperature is about 59 degrees today. I've decided just to address the repair instead of painting the entire deck again. I'll do that another year. I sanded with 150 grit paper before taping off a general area encompassing the repair plus any other sanded-off paint. Using Pettit Easypoxy 6149 Undercoater, I rolled the paint on and then tipped it with a foam brush to keep everything smooth. Everything is looking good so far - I'll use the topside paint (Pettit Easypoxy Semi-Gloss White 3106) tomorrow.


Wednesday, March 10th - Painting the Top
Okay, so I didn't do it yesterday, but I did finish it today, and everything looks good. Since it has been a couple years since I last painted the deck, the brand new paint "stripe" will stand out somewhat until it gets a little weathered as well. I know once I roll Orion out of the garage and I'll be able to see everything in the sunshine, it will really stand out. But I'm okay with that. I'll just think of it as a racing stripe for now. I'll paint the whole deck some other year, and it will all blend together just fine.
Is the repair perfect? Not quite. The surface is a little more uneven (lumpy) than I would like, the little raised non-skid area at the front of the cabin top could have been shaped a little better to match the rest of the cabin curve, and the paint makes it stand out. However, these are all cosmetic issues that I can address at a later time if I really want to. Structurally, this is much better. The tabernacle won't sink into the deck anymore, and, best of all, the deck core will never, ever rot again.

Sunday, April 4th (Easter) - Painting the Cabin Arch
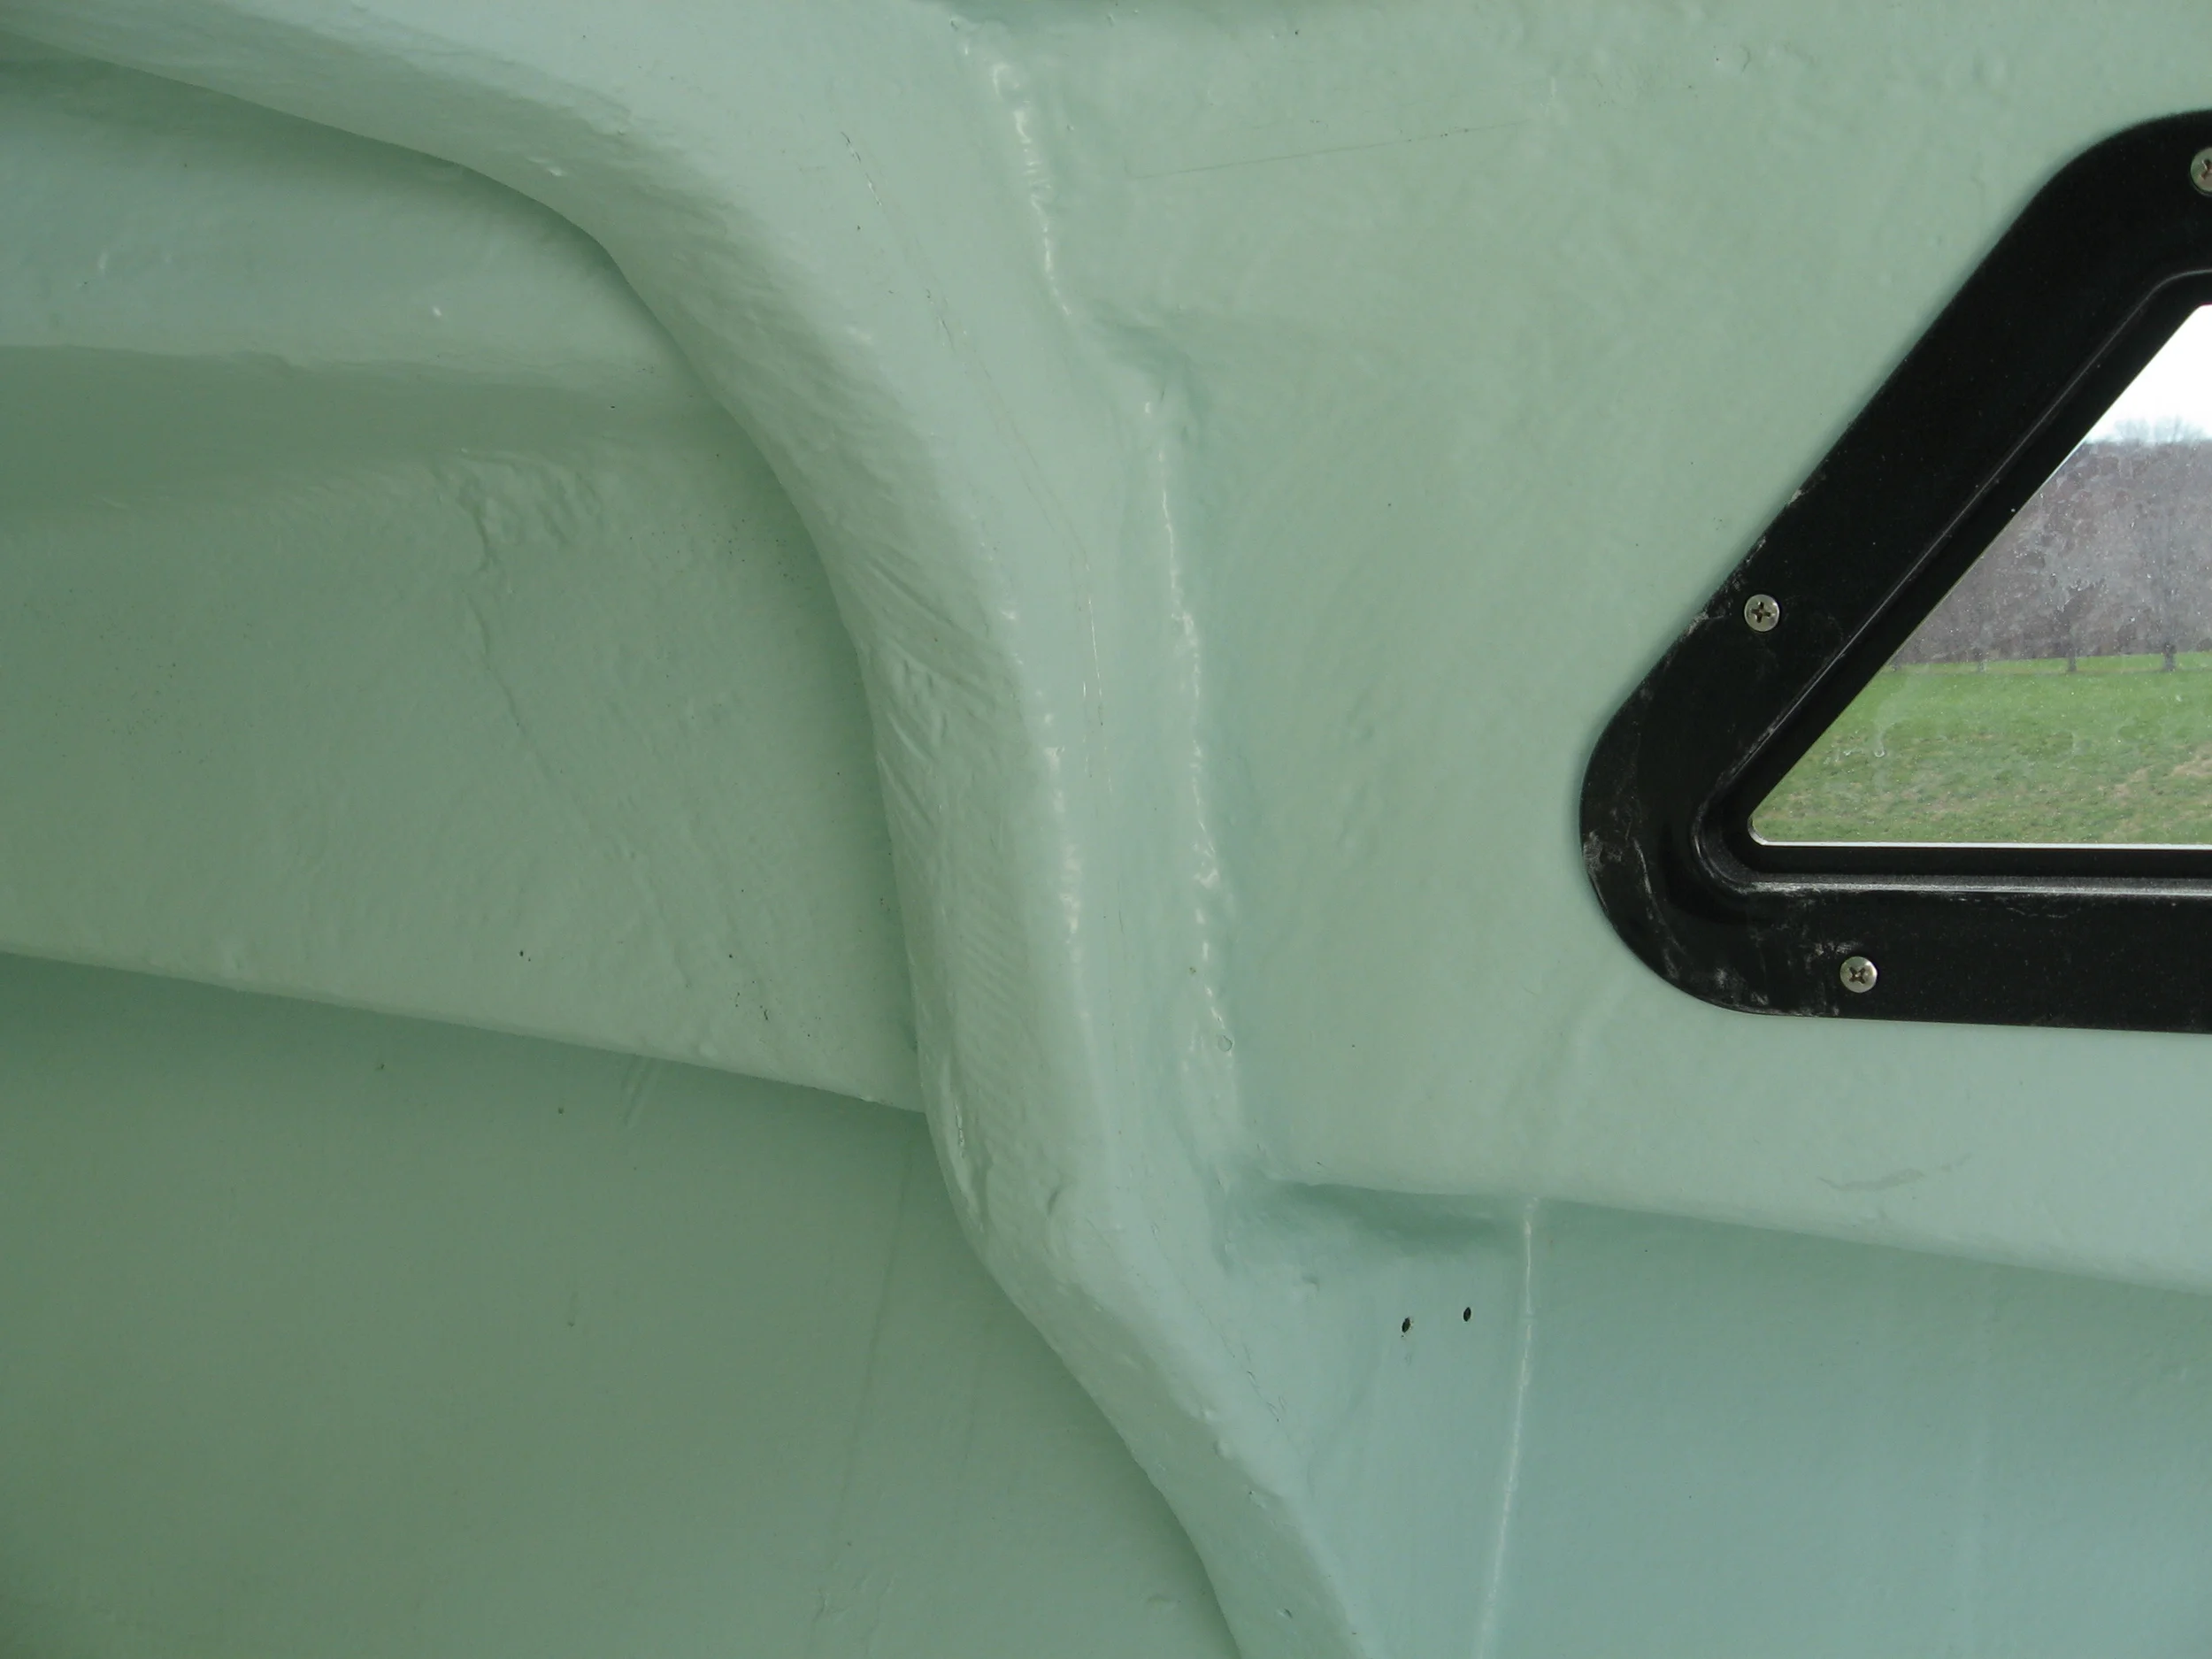
I was able to paint the mast arch inside the cabin today, and it looks great. Sure, you can still see where the repairs were made if you look very closely, but who is looking, anyway?
Now I just need to reinstall the tabernacle and halyard deck plate, and I'm done!
Thursday, April 8th - Finishing the Project!
Well, it's been a long time - especially since there was about a month during which I did not work on the deck core because of other real-life commitments. (Don't you hate it when they get in the way?) But, today, I installed the tabernacle and deck plate. I first carefully measured the spot where the tabernacle should go, thanks to some helpful measurements sent to me by Newt Wattis (#2604 My Lightning) and Eric Bluhm (#1703 Hirondelle). One cannot screw into carbon-fiber G-10; it must be drilled at tapped. So, going with 1/4-20 machine screws, I first drilled the appropriately-sized holes and then used a 1/4-20 tap. I put 5200 around each hole and underneath each machine screw head, I put the tabernacle on top of the deck plate, lined everything up and tightened the screws. Everything went in perfectly.


So, that's it! I can finally call this project officially completed! Everything went smoothly - it just took a while to do it. Now I never have to worry about the deck core rotting again. I'm very happy with the way it came out, and I can't wait to get the mast stepped and Orion launched.