Rubrail Repair
One of the crucial parts of any boat is the rubrail. This is the flange that is formed where the hull and deck are joined together. Over the course of a few decades, a boat's rubrail is rarely still in perfect condition - docks, pilings, boats, and other obstructions can damage the joint fairly easily. When I bought Orion, my initial inspection found that everything seemed fairly intact except for the bow - the previous owner had come in to the dock a little quicker than she had wanted and the boat took a "header". Ouch. But only the inner liner and outer rubrail was damaged - not the fiberglass flange, so that was a good sign.
When this and all other Mariners were made (and many other boats, for that matter), the deck and hull lips were put together and then stapled with industrial-sized staples. An inner PVC hard rubrail liner was then put over the whole joint and stapled again. Finally, the exterior vinyl rubrail snapped onto the inner liner, and that's the completed rubrail. Well, I decided during the winter to take the inner liner and the vinyl rubrail off and replace them, since a dingy, scraped-up rubrail would detract from the new, shiny paint job I had in store for Orion later on. What I uncovered was a lot more than what I had bargained for.
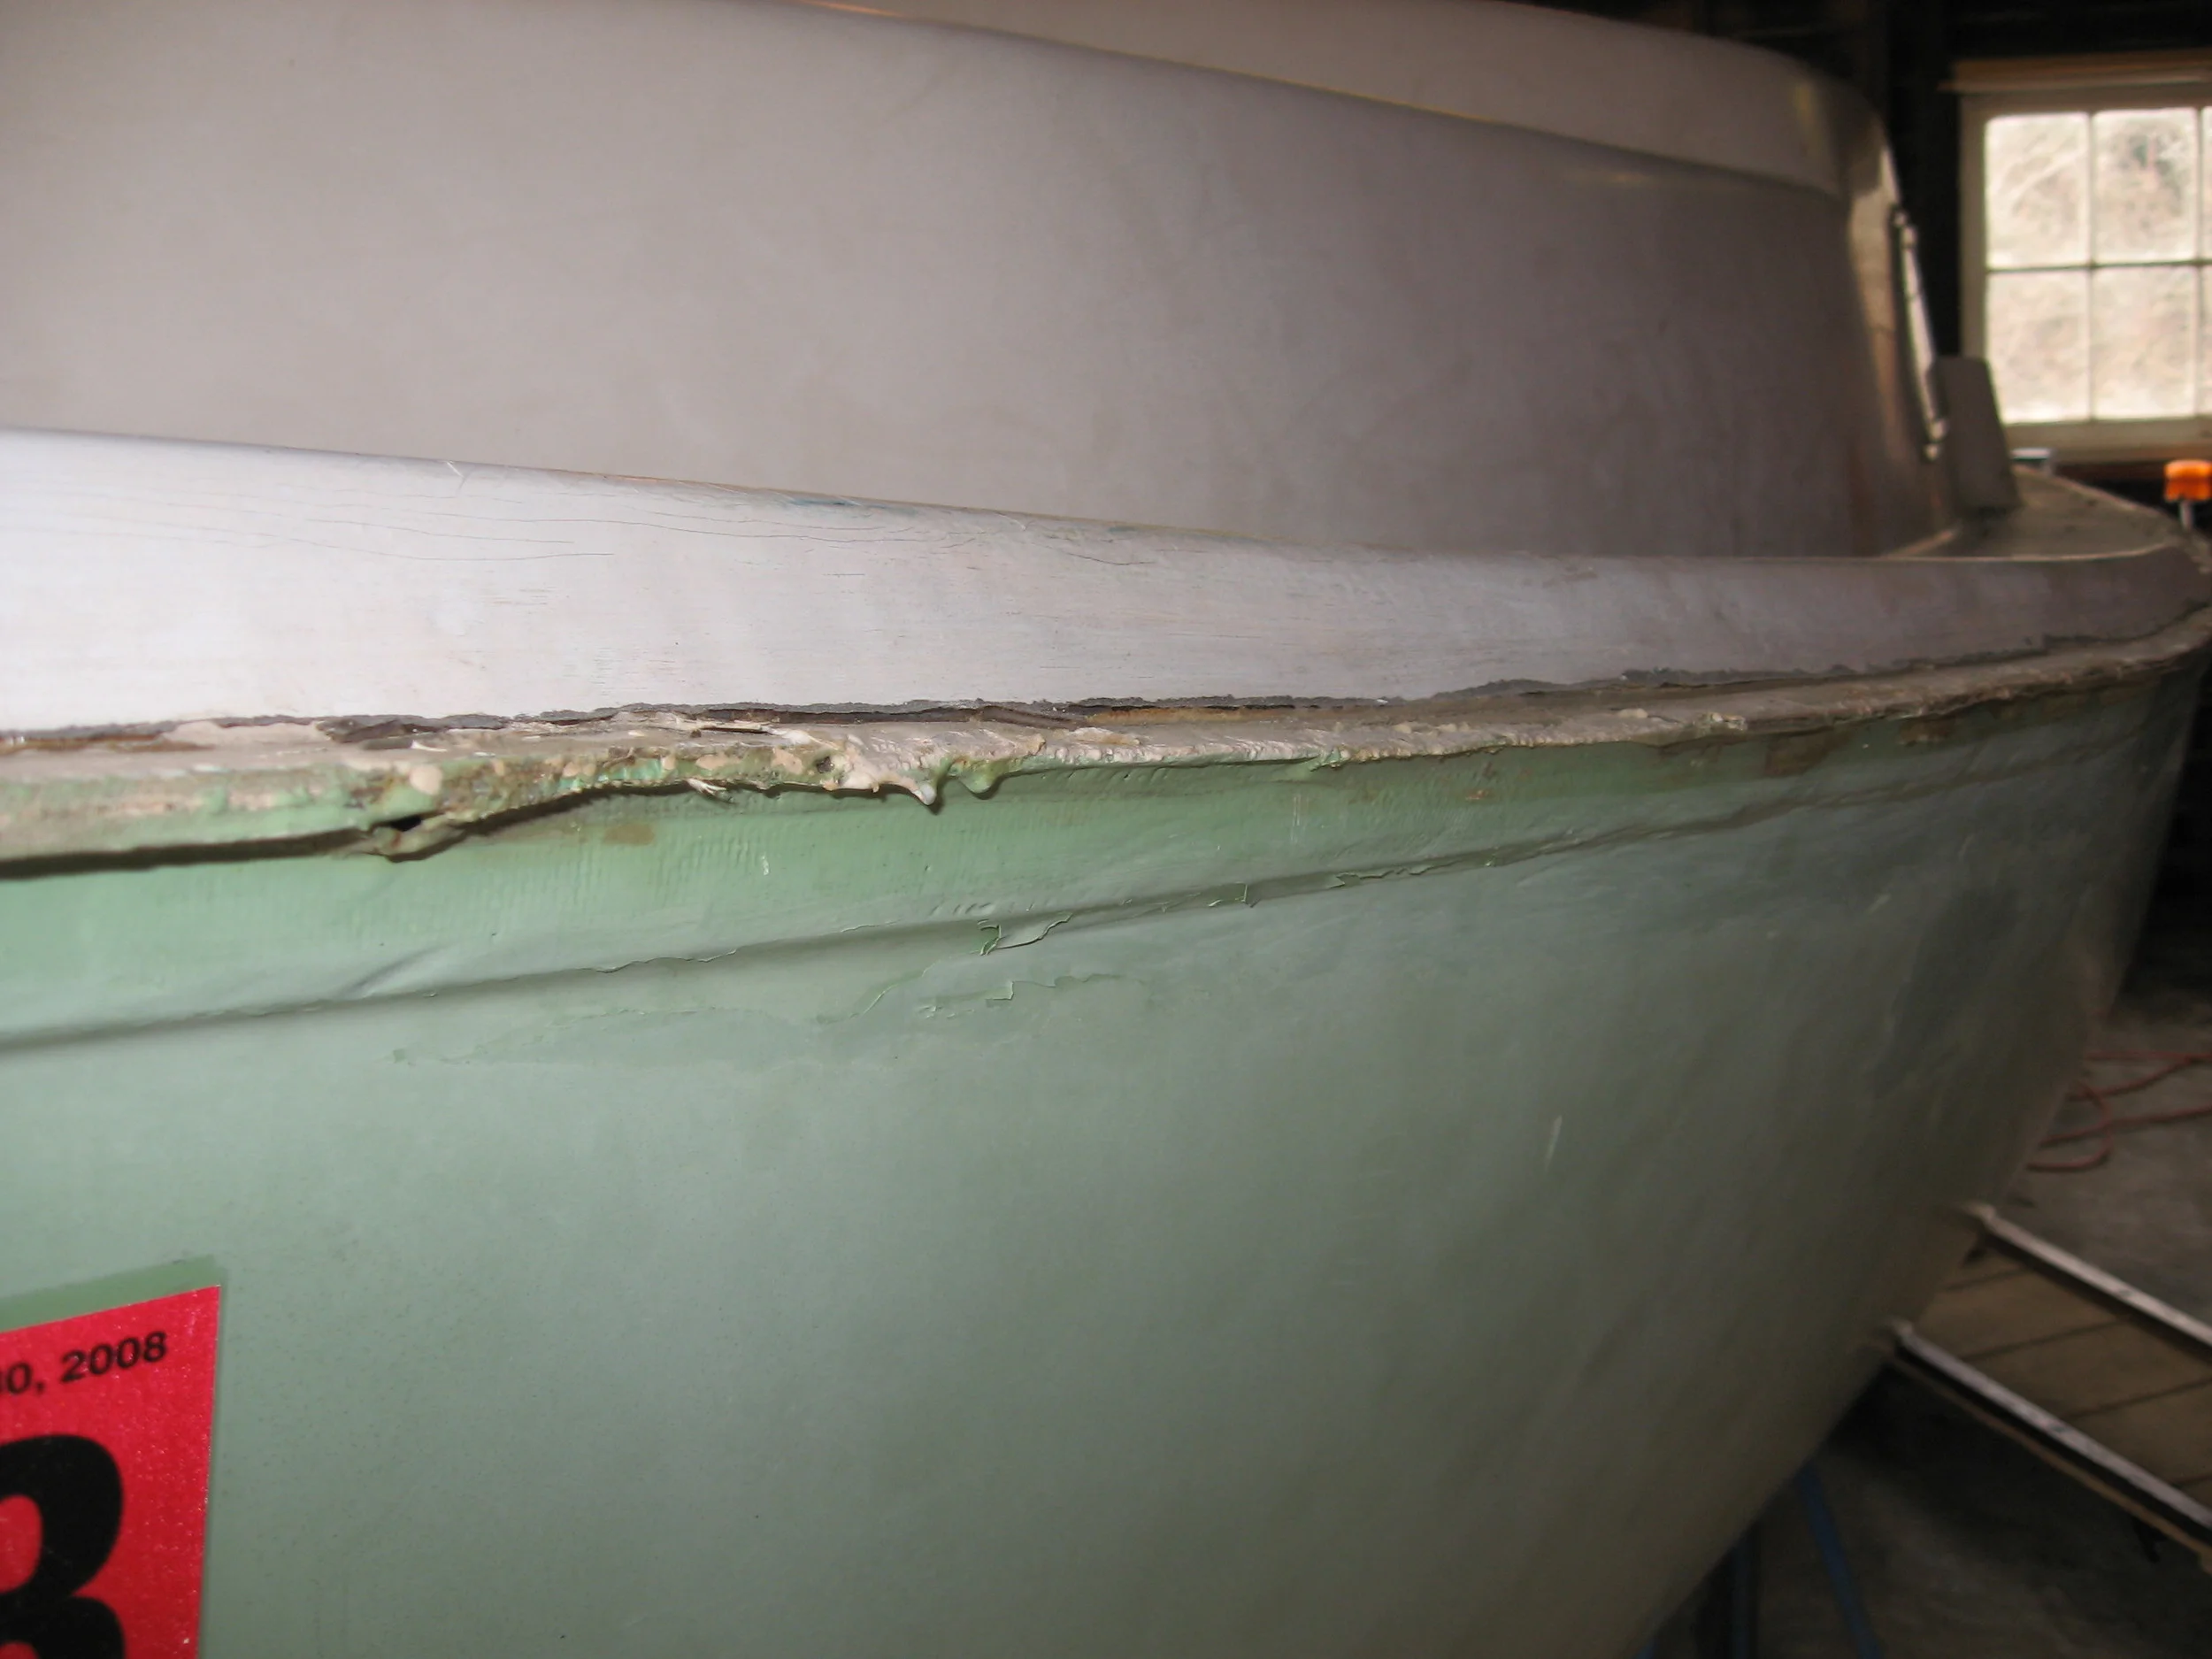

The outer rubrail came off after working at it, and after going around and removing the staples from the inner liner, that came off very easily. However, a chunk of the fiberglass flange on the starboard quarter came off with the inner liner. Not only that, but a five-foot section of the fiberglass flange on the port side had, at one point, been heavily damaged by a previous owner and hastily repaired. Chunks of that came off as well, but it was evident the whole section needed to be addressed. So much for taking the old rubrail off and simply putting a new one on. It was time to get creative with fiberglass.
Chris Fretz, owner of Mariner #2448, had a similar yet more extensive problem, and he ended up cutting off the flange altogether and applying several layers of fiberglass tape. Since the damage on my boat was confined to a relatively small section, I decided to rebuild the flange using WEST epoxy, 1/4" chopped fiberglass strands, and the procedure outlined by Terry Moulton in a past Mariner Maintenance article. Before I could get started on rebuilding the joint, however, I needed to scrape away the old 5200 that had been applied to the top edge of the vinyl rubrail, and the only way to do that was by hand with a scraper. That took a few hours and a lot of patience.
My next task was to grind away the five-foot section of flange that had been "repaired" - there wasn't much to it. I also ground down the missing chunk area to make it easier to apply the chopped fiberglass. It's always a little nerve-wracking removing/destroying a part of the boat to eventually make it better, but I kept focusing on what would hopefully be the end result. This, in turn, opened up two holes that had, unknown to me, previously been paper thin. So while I hated having the ability to stand outside the boat and peer into the cabin, I was glad I found them so I could block those holes with the fiberglass chop mix I was about to create.
Following Terry Moulton's general guidelines, I took a 3/4" thick pine board, ripped it to 2", and made it slightly longer than 5 feet to accommodate the entire repair area. After holding the board up to the boat just underneath where the new lip would go, I found I had to bevel off the top edge about 15 degrees so the lip would remain horizontal. I also realized, since the board would not bend to match the curve of the boat, so I made a number of relief cuts. This did the trick.
Before I could attach the board to the boat, however, I need to tape wax paper to the area, as this would allow me to shape the flange to some degree and remove the board/mould without having it stick to the repair. Then, I attached the board to the boat with just two screws - those screw holes could be filled later with epoxy, so I wasn't concerned about it. When the board was attached, I took scrap pieces of thin luaun plywood and screwed those to the board to make the edge of the lip - they protruded above the pine board only about 3/8". It didn't need to be thicker than that, as the original flange is only 1/4", and I didn't want to be sanding/grinding away a lot of excess material. You can see in the picture the nice channel the mould made for the new flange.


Once the wooden mould was attached, I folded the wax paper down and let it hang there. The next step was to take the 1/4" fiberglass chopped strand I had previously bought from a company in Massachusetts (a pound from Merton's was way too much, but I'd rather have too much than too little, and the price was great), mix it with WEST epoxy 105/205 until it was a really thick peanut butter consistency, and then pack it with the mixing stick (or a tongue depressor) into the mould. Then, simply fold the wax paper back over the top, press it down and pack it in a little tighter, and let it harden overnight (I gave it a few days just to be on the safe side).


After it had hardened, I removed the wooden mould and the wax paper, and voila! A new ugly-looking flange was formed. It's funny how every crease of the wax paper made an impression into the fiberglass/epoxy. After a lot of sanding/grinding to shape it just right, it ceased to be ugly and the repair actually looked pretty good! Could I have paid more attention to the "repaired" area above and below the flange? Yes, I could have, but my main concern was the lip itself, and once in the water, you can't even tell that anything is wrong. Besides, it's a boat, damn it! Not a piece of hitchcock furniture, as my father always liked to remind me.
The other, smaller chunk on the starboard side of the boat was a very easy repair. I simply taped wax paper to the area, clamped a thin piece of luaun plywood underneath, filled the gap with epoxy/fiberglass chop, and folded the wax paper back over the top. Because the area was so small, I didn't have to get very fancy, and I was able to sand everything afterward very easily until it was just right.
I waited until after the boat was painted to attach the new rubrail (I had bought the inner PVC liner and the outer vinyl rubrail from DR Marine). Since I didn't have an industrial-sized stapler, I decided to pop-rivet the inner liner. I held up each four-foot section of PVC to the rubrail and made careful marks where I could drill through the lip without encountering any staples through the existing flange. Then, placing the PVC over the flange, I drilled 1/8" holes right down through the PVC, into the flange, and out the bottom. (Boy, did I hate drilling through the new lip I had created!) A pneumatic riveting gun is a huge help here. I put about one rivet every foot or so. Looking good so far.
I attached the outer vinyl rubrail at one corner of the boat simply by snapping it on to the inner liner and screwing the end-cap on the back where it was originally. I then bribed some helpers to pull the rubrail with all their might as I heated about a four-foot section at a time with a heat gun. This enabled me to get the rubrail very tight and push it on the inner liner (with a little help from a rubber mallet). Heating and stretching it is important so it won't slip off any time. The corners were the trickiest parts, as they needed to be stretched more than anything to make those tight curves, but I just had to work at it. The whole process of putting the vinyl rubrail on took about an hour and a lot of sweat, but the end result was fantastic, and the repairs just disappeared.
It was a lot of work, but it needed to be done, and I'm extremely happy with the way it came out.